LudusHound: Raising BloodHound Attack Paths to Life
TL;DR LudusHound is a tool for red and blue teams that transforms BloodHound data into a fully functional, Active Directory replica environment via the Ludus framework for controlled testing. This tool can be used to replicate most AD objects and permissions or can be used to replicate a specific Attack Path. Full credit to this tool idea goes to Erik Hunstad, the creator of Ludus.
Github: https://github.com/bagelByt3s/LudusHound
The Problem
Security practitioners rely heavily on lab environments to test tools, techniques, and Attack Paths before bringing them into live environments. But most labs are built with generic setups, such as one domain and a couple of workstations and rarely capture the complexity of real-world Active Directory like multiple domains, logged on sessions, nested groups, excessive object permissions, and escalation paths.

Recreating these configurations manually is tedious, time-consuming, and doesn’t scale. Because of this, consultants often end up testing directly in production or relying on incomplete assumptions, while defenders may be hesitant to perform testing or hardening out of concern for causing outages or disrupting critical systems.

Enter LudusHound

LudusHound bridges a gap in red and blue team operations and provides the ability to recreate realistic Active Directory environments with misconfigurations and relationships based on actual production data. While tools exist to analyze environments (like BloodHound), to my knowledge, there has never been a simple way to take that data and automatically reconstruct a functional lab environment for testing or training.

How It Works
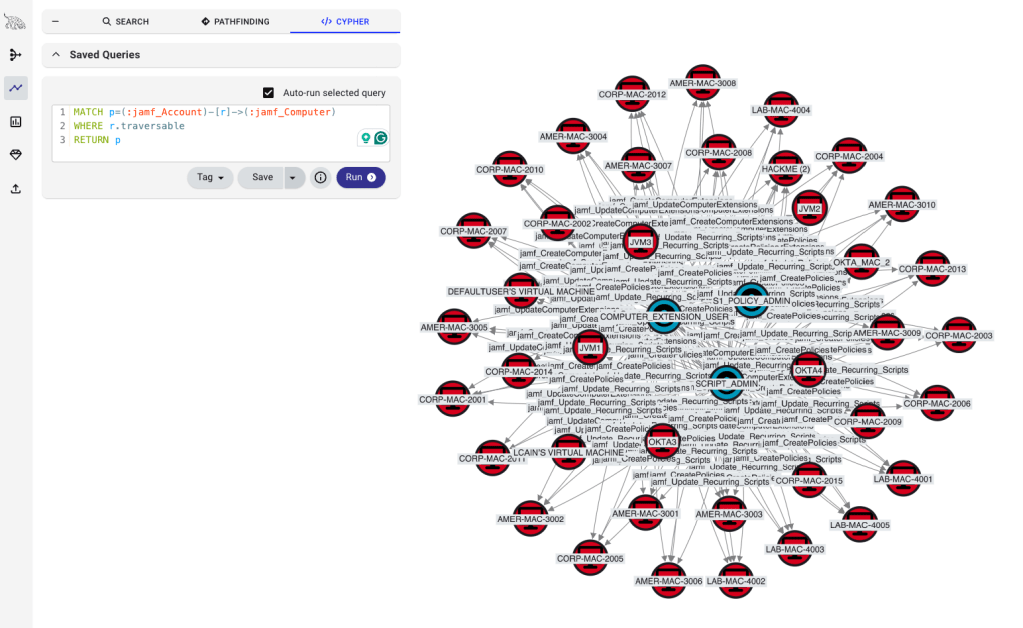
- Data Ingestion: LudusHound connects to the BloodHound server via its web API and queries the graph database. It retrieves domain object data including users, computers, OUs, GPOs, ACLs, and trust relationships. This data is saved as JSON which will be used later. The BloodHound API was chosen instead of using the original JSON that comes with a normal collection because it allows us to have better control of the fields necessary for LudusHound and saves the relationship edges in a format that is easy to parse later.
- Data Parsing: A Go-based parser analyzes the retrieved BloodHound data alongside user-provided input. It focuses on identifying computer roles based on AD computer properties and categorizes each machine. LudusHound assigns the appropriate Ansible roles for each system depending on the classification, and determines recommended resource allocations such as CPU and memory. For example, computers that are categorized as a domain controller will receive Ansible roles to configure the domain, but computers that are categorized as members will not. This logic is used to generate a Ludus configuration file that defines how each host will be deployed and provisioned.
- Configuration Generation: The generated Ludus configuration file maps each machine to a set of Ansible roles. Over 32 custom Ansible roles are used to automate the creation of AD objects and relationships, including user accounts, group structures, delegation settings, GPO links, and domain trusts.
- Environment Deployment: Using the Ludus framework, the generated Ansible roles are executed to deploy and configure the Active Directory lab environment. Ludus handles the provision of virtual machines, and runs the LudusHound Ansible roles for configuration.

Installation
Clone the LudusHound repo and install Ansible Roles.
git clone https://github.com/bagelByt3s/LudusHound /opt/LudusHound

ludus ansible collection add https://github.com/bagelByt3s/LudusHound/raw/refs/heads/main/Collections/bagelByt3s-ludushound-1.0.0.tar.gz
Build the LudusHound binary.
cd LudusHound
go build
Running LudusHound
The following is an example of how to run the tool. LudusHound must have network access to your BloodHound CE server.
./LudusHound
--Server 127.0.0.1 \
--User neo4j \
--Pass password \
--Output LudusRanges/LudusHound.yml \
--AliveComputers Titan.Ghost.Local,Eclipse.Child.Ghost.Local,Avalanche.Specter.Local,Raven.Ghost.Local,Nova.Child.Ghost.Local,Mirage.Specter.Local
This is a breakdown of the command arguments:
--Server: The IP address of the pupulated BloodHound server
--User: The username of a valid BloodHound account
--Pass: The password to the BloodHound user
--Output: The Ludus range configuration file that will be generated
--AliveComputers: The computers that will be created and deployed as live systems
This is what it looks like to run the tool.
root@ludus:/opt/LudusHound# ./LudusHound
--Server 127.0.0.1 \
--User neo4j \
--Pass password \
--Output LudusRanges/LudusHound.yml \
--AliveComputers Titan.Ghost.Local,Eclipse.Child.Ghost.Local,Avalanche.Specter.Local,Raven.Ghost.Local,Nova.Child.Ghost.Local,Mirage.Specter.Local

Server: 127.0.0.1
User: neo4j
Password: password
Output: LudusRanges/LudusHound.yml
Directory to save BloodHound Files: ./Tmp/2025–06–06_20–16–53
Domain Identified: SPECTER.LOCAL
Retreiving AD Objects for SPECTER.LOCAL
Domain Identified: GHOST.LOCAL
Retreiving AD Objects for GHOST.LOCAL
Domain Identified: CHILD.GHOST.LOCAL
Retreiving AD Objects for CHILD.GHOST.LOCAL
Retrieving object relationship mapping for all domains and saving to:
./Tmp/2025–06–06_20–16–53/Relationships/Relationships.json
Data successfully saved to ./Tmp/2025–06–06_20–16–53/filesMap.json
Generating Ludus YML Config:
Creating config for TITAN.GHOST.LOCAL
Creating config for ECLIPSE.CHILD.GHOST.LOCAL
Creating config for AVALANCHE.SPECTER.LOCAL
Creating config for RAVEN.GHOST.LOCAL
Creating config for NOVA.CHILD.GHOST.LOCAL
Creating config for MIRAGE.SPECTER.LOCAL
Writing Ludus Range to LudusRanges/LudusHound.yml
The next step is to provide the generated Ludus range configuration file to Ludus and deploy the range.
ludus range config set -f LudusRanges/LudusHound.yml
ludus range deploy
After a couple of hours, you will have a Ludus range with the same domain trusts, user, computer, and group objects, GPO’s, OU’s, sessions and relationships as the production environment.
Raising BloodHound Attack Paths to Life
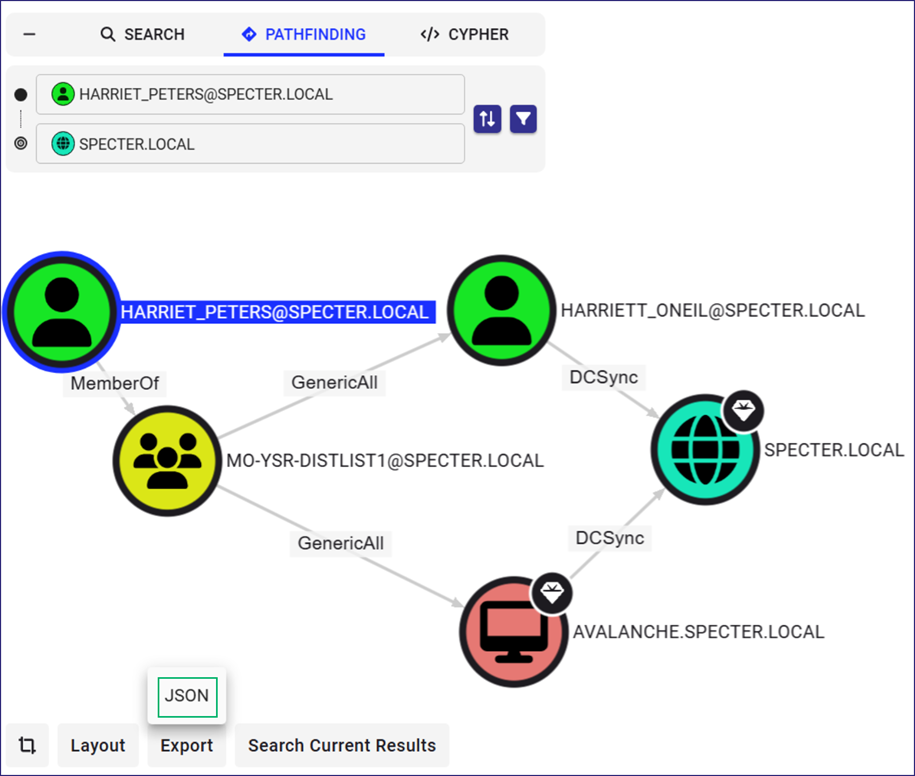
My colleague, Garret Foster had some great feedback on this tool idea. For larger environments that would take a long time to deploy, LudusHound should have a feature to only recreate a specific Attack Path. BloodHound has an option which allows us to export a specific Attack Path in a JSON file. This can be used with LudusHound to recreate only the objects and edges listed in the file.
To recreate a specific Attack Path with LudusHound, simply navigate to the desired Attack Path in Bloodhound, and export the JSON. This JSON file will have the objects and relationship edges listed in the Attack Path.
Run LudusHound and provide the Attack Path JSON to create a Ludus range configuration file that will recreate the objects and edges.
./LudusHound --AttackPath graph.json \
--DomainController TITAN.GHOST.LOCAL \
--Output LudusRanges/AttackPath.yml \
Successfully created Ludus range configuration at: LudusRanges/AttackPath.yml
This is a breakdown of the command arguments:
--AttackPath: The file path to the Attack Path JSON file exported by BloodHound
--DomainController: The domain controller host name that will be created for the domain
                    This is necessary because the exported JSON does not always have the domain                                 controller listed
--Output: The Ludus range configuration file that will be generated
Just like before, provide the created Ludus range file to Ludus and deploy.
ludus range config set -f LudusRanges/AttackPath.yml
ludus range deploy
Caveats
LudusHound currently supports computers, groups, sessions, and most of the BloodHound edges.
This tool strictly focuses on AD objects and permissions, and currently does not support individual components like SCCM and AD CS. I do plan on implementing these in upcoming versions when development time allows.
During testing, Ludus occasionally encounters errors with the LudusHound configuration that typically resolve with a redeployment. While I’ve conducted a lot testing, Active Directory environments present countless edge cases — specific permission combinations, unique domain configurations, and other variables that I may not have tested.
If you encounter any bugs or unexpected behavior, please don’t hesitate to reach out!
Conclusion
My wish for this tool is to aid cyber professionals by saving time and headache configuring and providing more time for operating. Being a blue teamer in a previous life, I wish I had something like this to better understand and test the organizations I was in charge of defending. If you have any suggestions, or feedback to improve this tool I would love to hear it!
LinkedIn: https://www.linkedin.com/in/beyviel-david-793585164
Twitter: bagelByt3s
Credits
This amazing tool idea originally came from Erik Hunstad/@kernel-sanders, the creator of Ludus, who gave me permission to develop and build it!
Huge thank you to Jonathan Owens/@DragoQCC, Zach Stein/@Synzack, and Garrett Foster/@unsigned_sh0rt who helped with tool design. This would not be where it is without all of that planning and discussion.