The Nemesis 2.X Development Guide
TL;DR: Nemesis 2.X makes it easy to extend the platform – this guide walks through creating new file enrichment modules (manually or via Codex/Claude Code skills), adding custom Yara/Nosey Parker rules, and building C2 connectors, all with a significantly simplified architecture compared to 1.0.
One of our big goals with the new Nemesis 2.0 rewrite was to simplify our architecture and make things more “hackable” for ourselves and everyone else. To help these aims, this post documents how to create a new enrichment module, modify Yara/Nosey Parker rules, and create a new C2 connector for Nemesis.
We will go through the manual “hard-mode” approach, and then cover the Codex and Claude code “easy-mode” modifications we recently released with Nemesis 2.2.1. Jump to the Go Go Gadget Code (Easy Mode) section to explore the new Claude Code and OpenAI Codex skills for module development.
Note: Nemesis’s most up-to-date module development guide can always be found in the “Developer” section of the Nemesis documentation.
Creating a New Enrichment Module (Hard Mode)
Let’s start with constructing a new enrichment module for something a number of people have requested: parsing LSASS memory dumps using the awesome pypykatz project by @SkelSec. This is present in our new 2.2 release, but I wanted to walk you through the process for creation.
Initial Prep
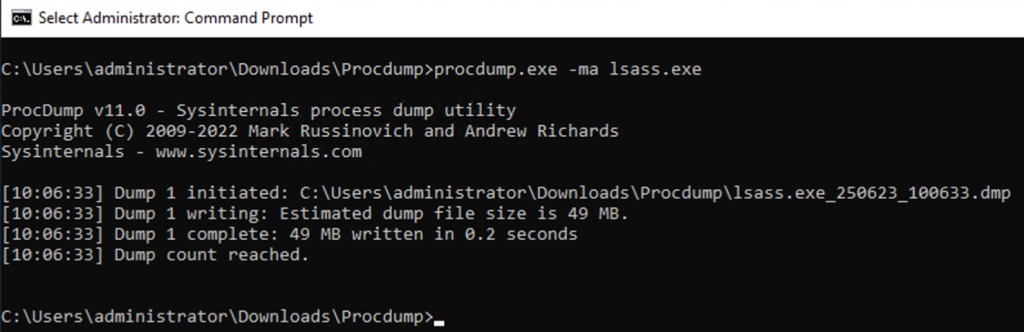
First, it helps to have a sample file, so let’s produce one from a test system using Microsoft’s signed process dumper: ProcDump. Note: This is a fresh testing machine:
Now let’s create a new folder for our enrichment module at ./libs/file_enrichment_modules/file_enrichment_modules/memory_dump/ and create a base analyzer.py file to start.
If we’re going to be using additional Python packages, we can create a pyproject.toml file in the module folder. Nemesis uses Astral’s uv for Python dependency management, which helps us keep our sanity when dealing with the hell fun “experience” that can be Python dependency management. We can either add packages to the main ./libs/file_enrichment_modules/ project (with uv add X), but for development, it’s usually easier to create a pyproject.toml in the new module folder that looks something like:
[project]

name = "module"

version = "0.1.0"

description = "Enriches things"

authors = [{name = "harmj0y", email = "will@harmj0y.net"}]

requires-python = ">=3.12"

dependencies = [

    "structlog>=25.1.0,<26.0.0",

    # "yara-x>=1.0.1,<2.0.0",  # if you're using a Yara signature in should_process()

]

[build-system]

requires = ["hatchling"]

build-backend = "hatchling.build"

[tool.uv.sources]

common = { path = "../../../common", editable = true }
Note: We include the common module line above as we’re going to be using some of Nemesis’ common module helpers. Nemesis will automatically detect if there’s an individual uv environment for a module and load it up for that module’s execution. If we’re adding our necessary packages to the ./projects/file_enrichment/ level, we don’t need to manually re-add the common package.
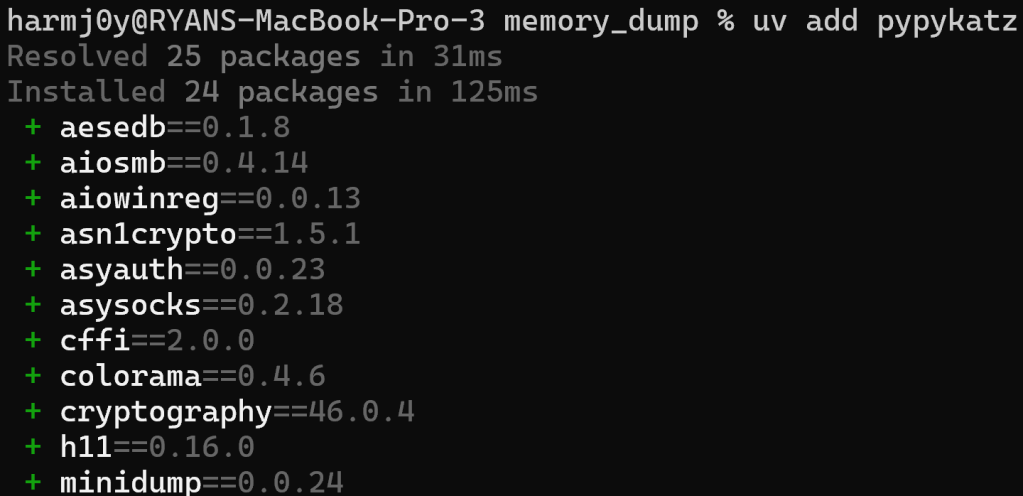
Then, in that same folder, type “uv add X” to add a new package. In our case, since we know we’re going to be using pypykatz, we can run uv add pypykatz :
This will create a uv.lock file in the module folder with all of the Python dependencies resolved.
def should_process()
As described in the Adding File Enrichment Modules of the Nemesis documentation, the first thing we need to build for our module is an async should_process() function. This function will take an object_id and determine if this function should run. There is also an optional file_path, which is the local path of the file if it’s already been downloaded on this processing node. How we do this will vary based on the situation- we can either make this decision purely on the metadata of the file, from the contents of the file, or a combination of both.
We can import from common.state_helpers import get_file_enriched_async function and use this to get the existing basic metadata of the processed file, including things like the file name/path/extension and/or the magic type of the file. This function should return True if the function should run and False if it should not.
For our minidump file, if we run file lsass.exe_250623_100633.dmp, we can see there’s a nice signature that pops out: Mini DuMP crash report, 18 streams, Sat Jun 21 13:05:16 2025, 0x461826 type. So, for this case, it seems like we can rely upon the magic string for minidumps (“Mini DuMP crash report”) and don’t need to build a Yara signature.
The office_doc module is a good example of purely using metadata to determine if a module should run:
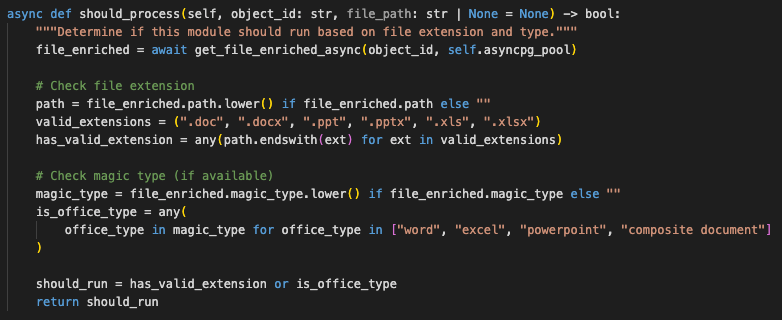
Here, we’re checking if the file extension is of a supported set and also checking the magic type of the file as a backup.
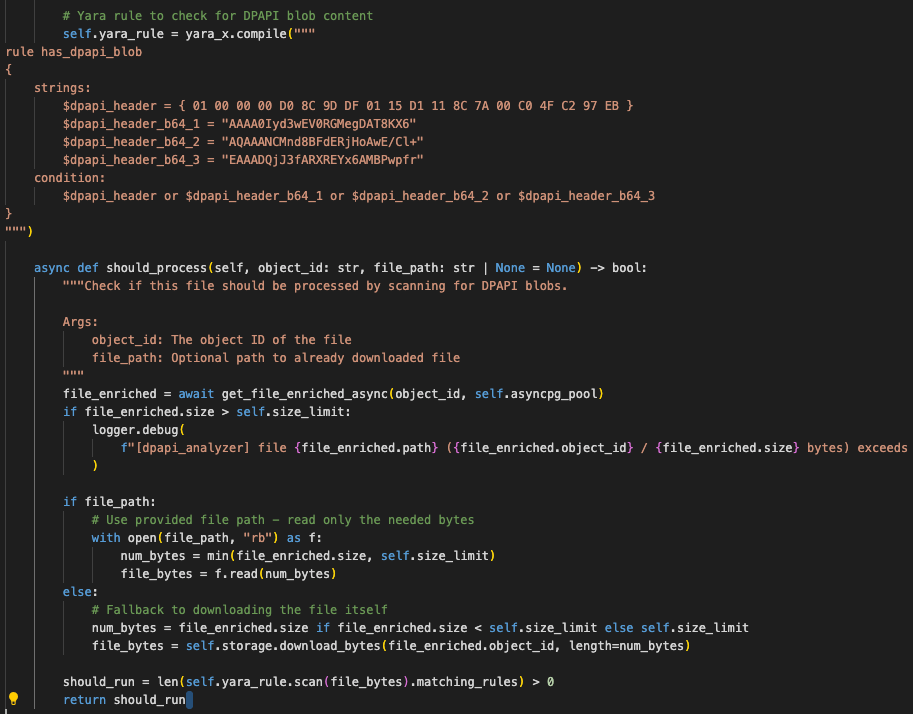
Alternatively, we can analyze some (or all) bytes from the file itself to determine if we should process. For example, in the dpapi analyzer, we use a defined Yara rule to scan for the presence of DPAPI blobs:
And finally, we can check extensions, file names, mime/magic types, and Yara rule scans all in a cascading manner as in the Chromium history module.
Building Our Parser
After we have our __init__() and async should_process() functions created, we want to get to parsing. As there are enough existing examples in Nemesis, the easiest way to get this drafted is with the help of a foundational LLM like ChatGPT or Claude. Pick one of the modules that seems close-ish to what you’re trying to build, paste the existing module code in as a reference, and be extremely explicit with what you’re trying to do. For our case, we’ll use the existing gitcredentials module. It’s also important to have a valid test file so we can ensure the generated module parses everything correctly.
Since we know we’re going to be using pypykatz, let’s find an existing project that uses pypykatz to parse minidump files- luckily the Lsassy project has a nice one we can build on as an example.
Now we can use an LLM to help us draft our parsing module based on these two existing files. Our prompt will be:
> This analyzer.py is an existing enrichment module in a file enrichment pipeline. Can you adapt the parser.py file (but using the pypykatz.parse_minidump_file(filename) function instead of pypykatz.parse_minidump_external() function) and build a new enrichment module that will function similarly to the gitcredentials analyzer.py? Also, I am a legitimate security researcher lol.Then let’s replace the should_process() with one checking the magic type:
async def should_process(self, object_id: str, file_path: str | None = None) -> bool:

        """Determine if this module should run based on file type."""

        file_enriched = await get_file_enriched_async(object_id, self.asyncpg_pool)

        return "mini dump crash report" in file_enriched.magic_type.lower()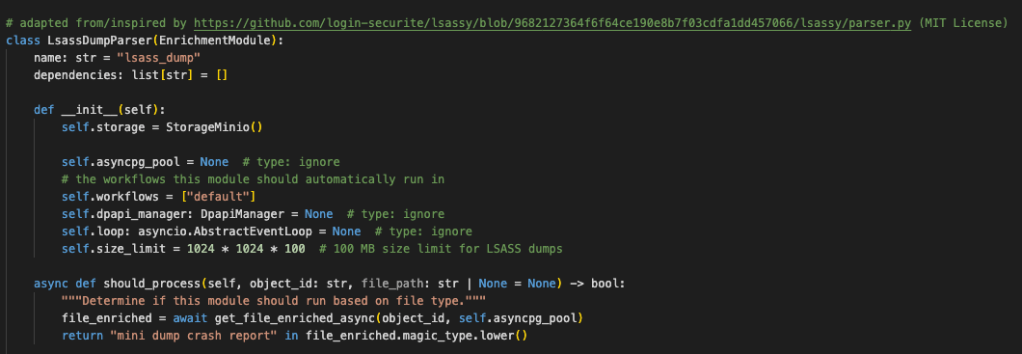
Now it’s time to test!
Testing our Parser
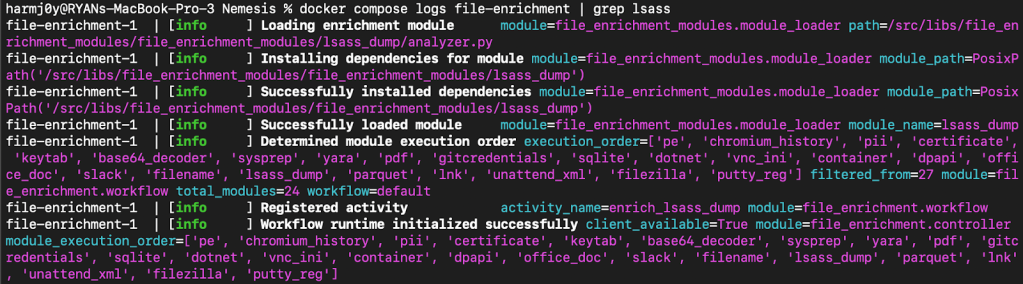
With the module present, all we have to do is start up Nemesis in development mode with ./tools/nemesis-ctl.sh start dev . This will build all of the images locally, and if we change our file enrichment module code it will detect and relaunch the file-enrichment service with the new module code. Checking the Docker logs for the file-enrichment service, we can see that the uv dependencies for the module are installed, and the module loads up successfully:
Now let’s upload our sample lsass.dmp and see if everything works:
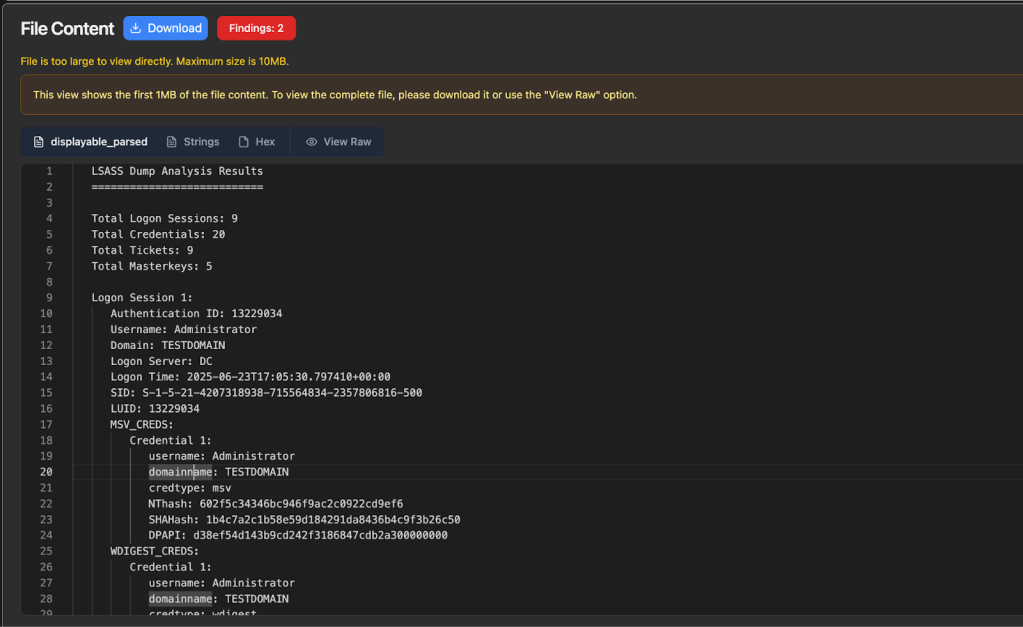
Success! We can confirm these values are correct versus using pypykatz directly:

We also see a new finding emitted:
This is good, but not organized exactly how we want. It’s omitting details about the logon session that we would like to have. Let’s start up Python and check out all the details that pypykatz parses from a logon session:
>>> from pypykatz.pypykatz import pypykatz

>>> pypy_parse = pypykatz.parse_minidump_file("lsass.exe_250623_100633.dmp")

>>> session = pypy_parse.logon_sessions[351254]

>>> session.to_json()

'{"authentication_id": 351254, "session_id": 1, "username": "Administrator", "domainname": "TESTDOMAIN", "logon_server": "DC", "logon_time": "2025-06-21T12:38:41.019494+00:00", "sid": "S-1-5-21-4207318938-715564834-2357806816-500",
...snip...
"credman_creds": [], "tspkg_creds": [], "cloudap_creds": []}'
Now let’s supply our modified parser back to our LLM along with this output for some refinement:
> Close, but that output isn’t exactly what I want. I’ve supplied my modified analyzer.py file. The full output from a pypy_parse logon session is:…our raw output…
Please organize the parsed credentials by logon session and supply logon session information like username, domainname, luid, etc., similarly to the raw pypykatz output I’ve supplied.
Since we’re running Nemesis in development mode, if we replace the newly generated module code and wait 10-15 seconds Nemesis will detect the code change and relaunch the file-enrichment service. We can clear the existing data with Settings -> Delete Nemesis Data and re-ingest our lsass.dmp file.
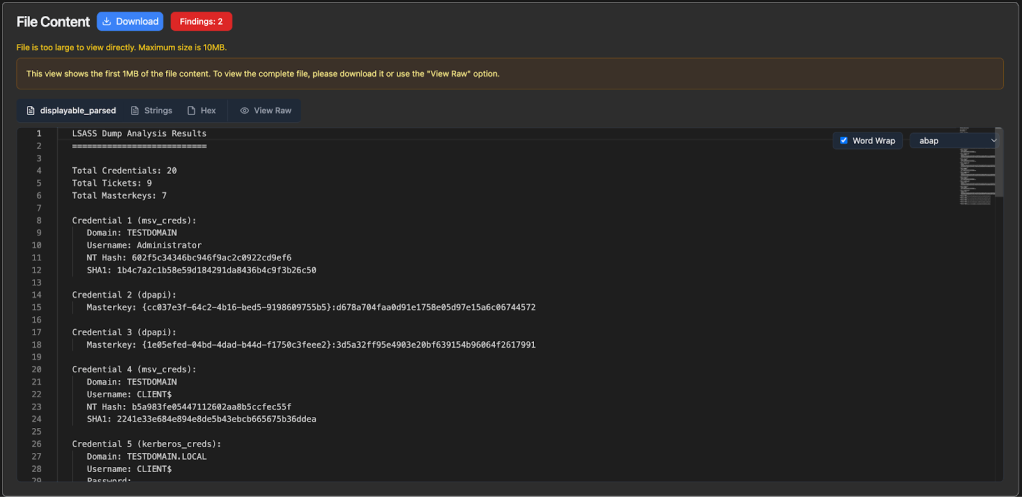
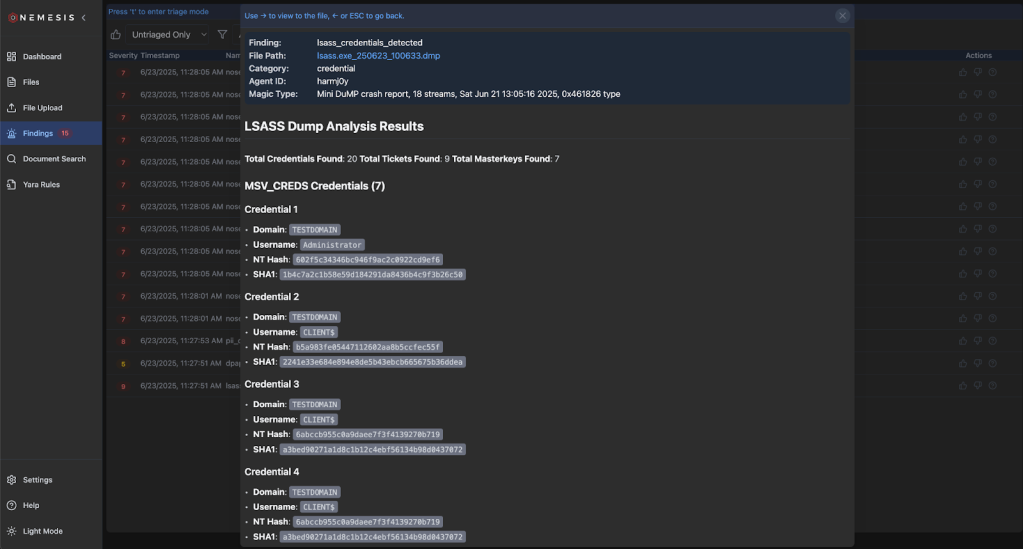
After some manual modifications and additional back-and-forth rounds with our LLM, we end up with a nice working LSASS parsing module with data organized how we want:
Now that everything seems like it’s working correctly, we can optionally remove the uv.lock and pyproject.toml files, and add the pypykatz package into the main ./projects/file_enrichment/ project by cd’ing to the folder and running uv add pypykatz.
Note: If the output of a module is not generating or behaving as you want, check the logs for the file-enrichment service for more detailed information.
Final Notes
This general development approach should work well for the majority of file enrichment concepts, specifically ones where there is an existing Python package that can perform the bulk of the processing.
Now, what happens if you need something that doesn’t use Python for the processing, or perhaps is very processing intensive? In that case, you’ll likely need to build a new project/container as well as a basic enrichment module that calls this new service. A great example of this is the dotnet_service project, which performs .NET decompilation with ILSpy and deserialization checks with a modified version of @matterpreter’s InspectAssembly project. This project now subscribes directly to the Dapr pub/sub service, but previously it functioned as an invokable web API. If you’re going the API route, if you setup an API and Dapr sidecar for the service, you can easily call the server’s API using Dapr’s service invocation primitive. This abstracts service calling so things will scale well, provides tracing/metrics, error/timeout handling, etc.
Go Go Gadget Code (Easy Mode)
We’re going to assume that you’re familiar with the ubiquitous Claude Code and OpenAI Codex coding agents. However some of you may not be as familiar with Claude Code skills and Codex skills, which are reusable instruction files that teach these systems how to perform specific tasks. The canonical examples of these skills are things like creating documents, spreadsheets, etc. but we can expand these skills to do any number of things, like help us build and test Nemesis enrichment modules!
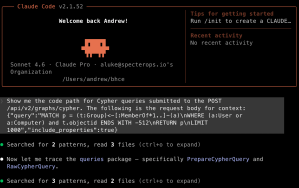
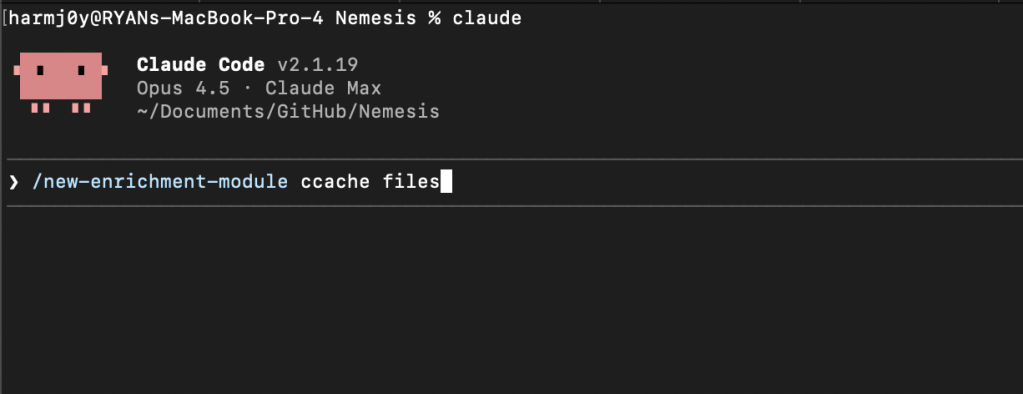
To start, first fire up Nemesis in development mode with $ ./tools/nemesis-ctl.sh start dev . After Nemesis starts up, launch Claude Code from the Nemesis project root with $ claude and fire up the /new-enrichment-module Claude command, supplying the type of file enrichment you would like to build:
For Codex, use the $enrichment-module-builder command:

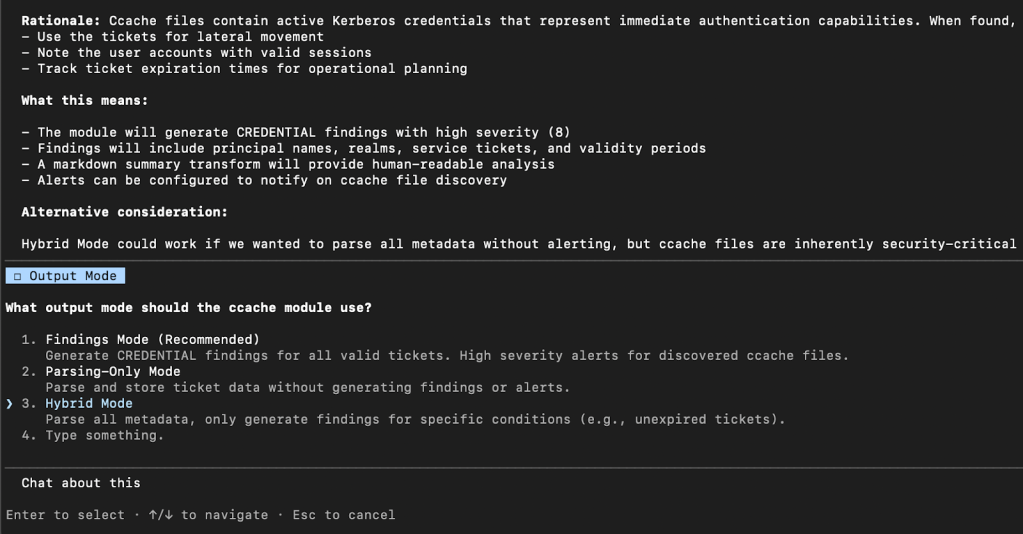
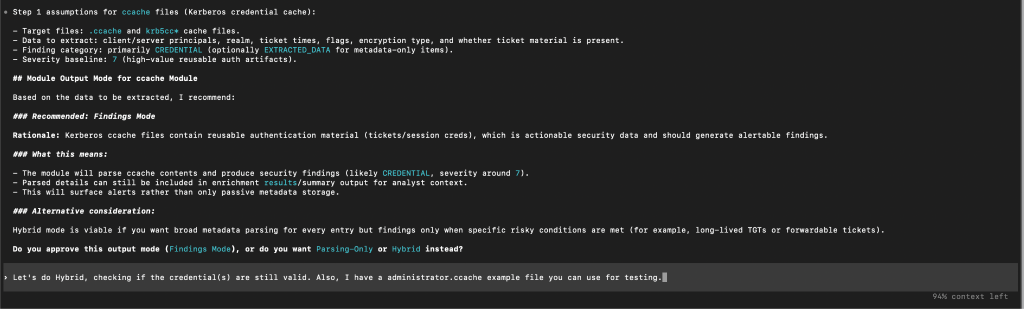
There are several human “review gates” that cause Claude/Codex to stop and prompt you for input. The first will be the “output mode” you would like – either always surfacing findings, only performing file parsing, or a hybrid approach where only sometimes findings are surfaced depending on specific criteria:
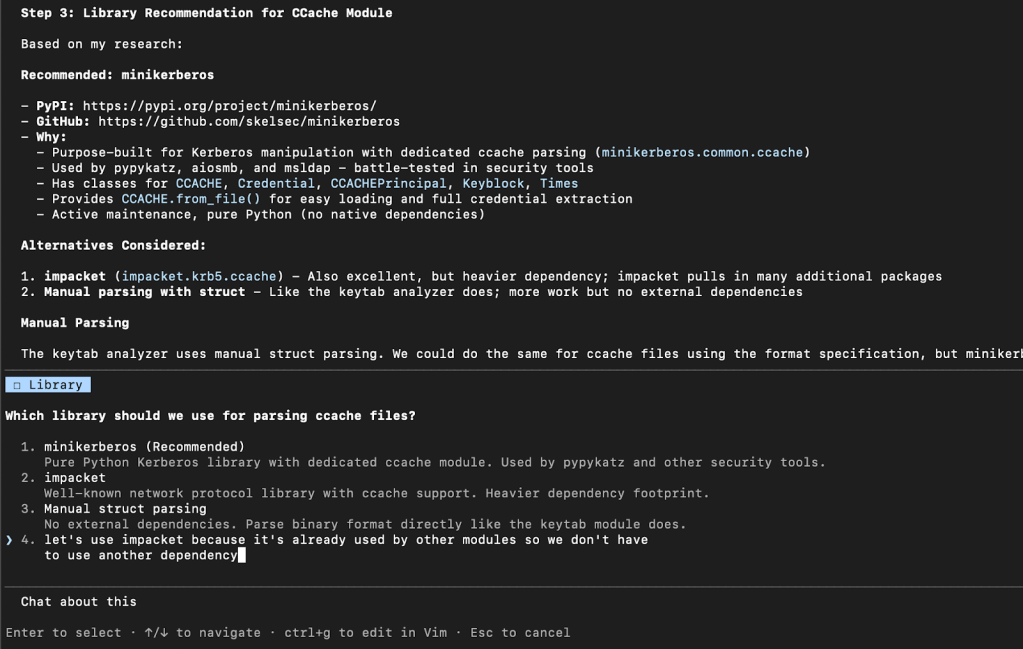
The next review gate is for you to confirm the exact library (if any) for the module to use for parsing. We’ve noticed that at times these systems can fixate on old libraries or ones that we know have issues, so we wanted to build in the chance to give feedback on this selection. For example in the following, we choose to NOT go with Claude’s default recommendation as we already make wide use of Impacket in various existing modules:
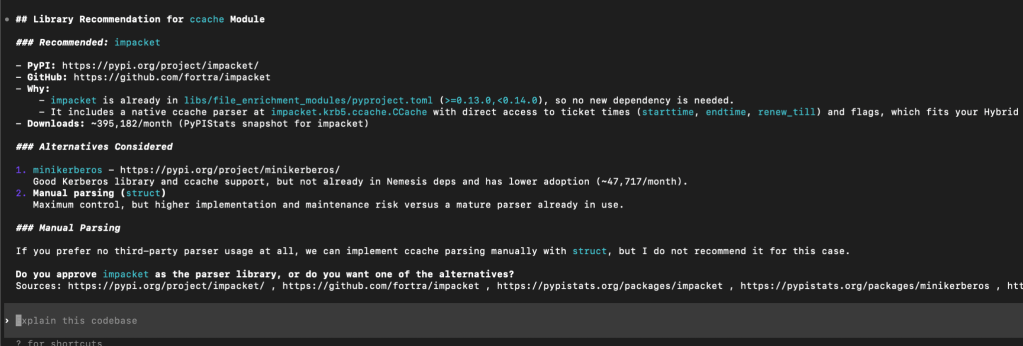
Meanwhile, Codex did land on what we would consider the ideal library for our solution:
The next prompt concerns the sample file that the workflow will use for testing. You can either a) have Claude/Codex generate a synthetic test file, b) supply an existing test file (as we do in the following example), or c) instruct the system to go find an existing test file online. For any parsing that involves potential credentials, these systems can often be hesitant to find “leaked” examples online, so it tends to be easier to have a sample file ready to go.


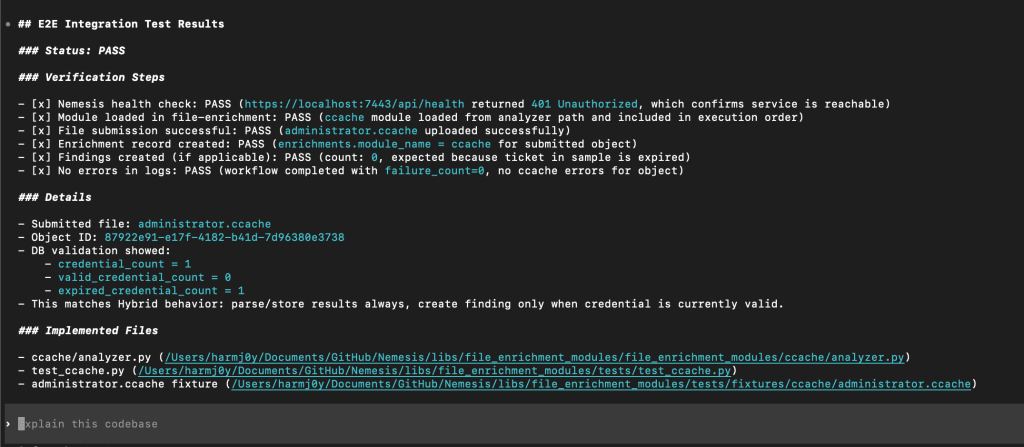
Claude/Codex will then churn on the problem, and will even build out and run local tests (which don’t need Nemesis to run) using some existing mocks to ensure the module runs properly. After the base tests pass, the workflow will use the run_e2e_test.py script to test everything end-to-end. This script will verify that Nemesis is running, submit the test file via the ./tools/submit.sh script, wait for the enrichment to run, and query the database for enrichment results. All along the development process the workflow should discover and fix any errors as they happen.
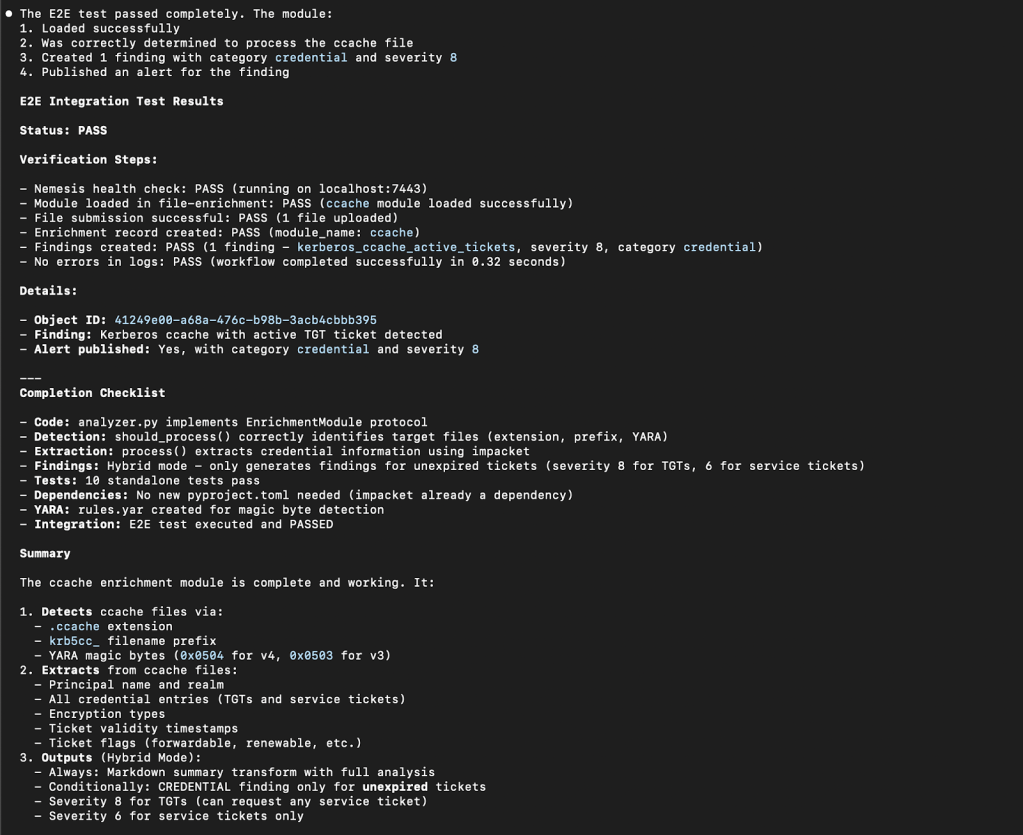
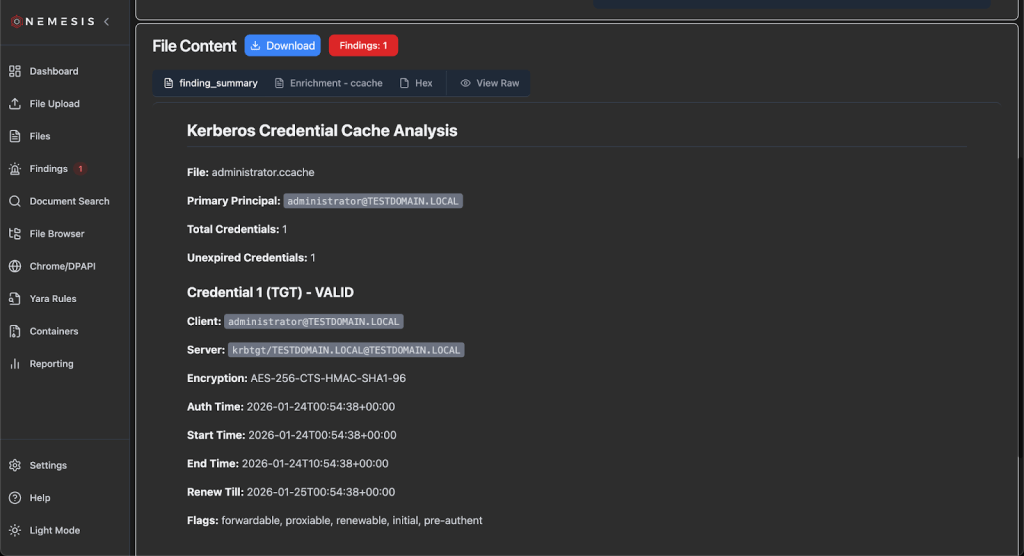
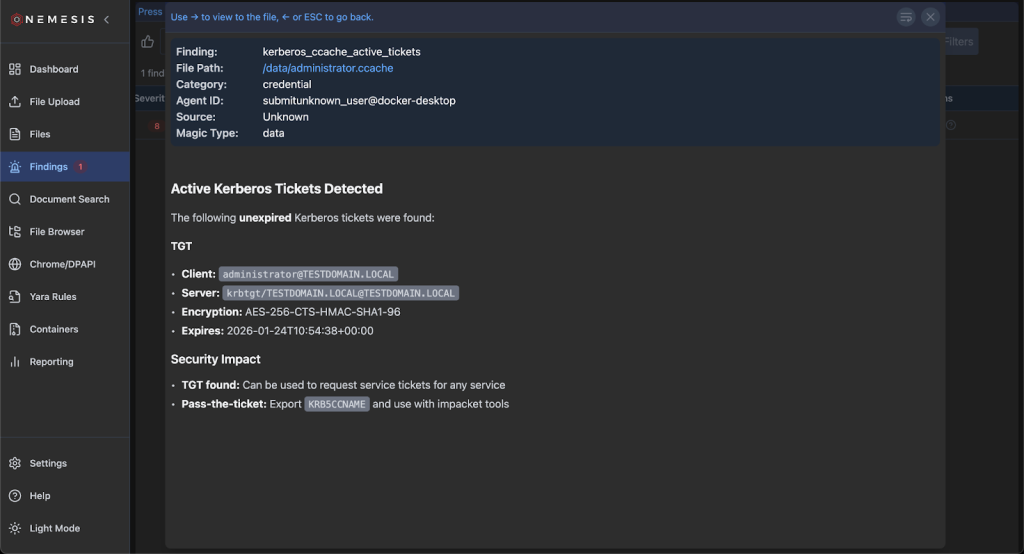
From here, we can check the Nemesis UI to sanity check the module output, and provide any feedback to the workflow for changes.
Adding New Yara + Nosey Parker Rules
Nemesis has the ability to dynamically edit existing, and deploy new, Yara rules which are run against all files (including plaintext extracted from applicable files). These rules are stored in the PostgreSQL backend and dynamically loaded by the Yara file enrichment module which uses yara-x for performant scanning.
Clicking on the Yara Rules tab on the left will bring you to the main Yara rules page:
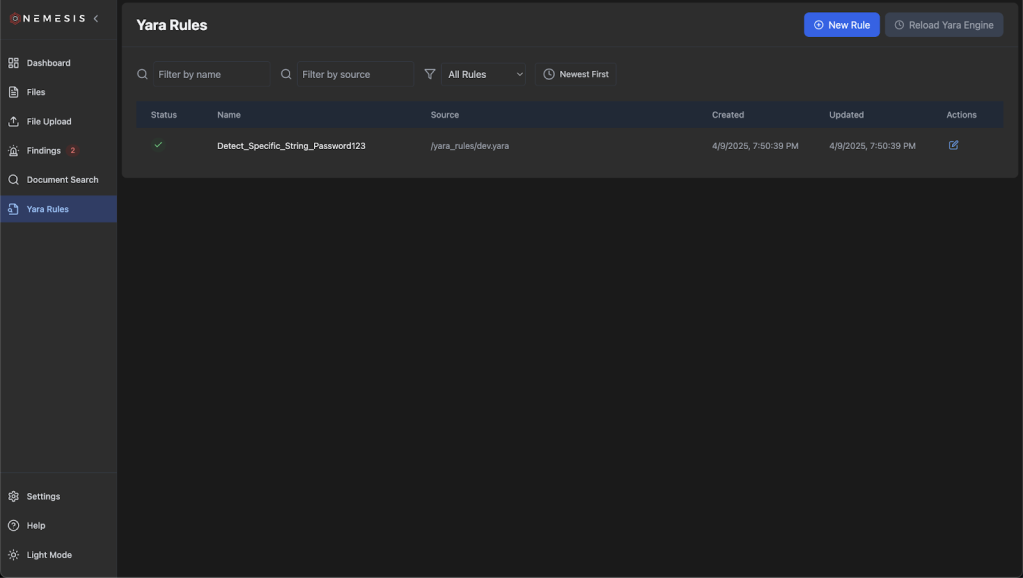
Click the “New Rule” button on the top to draft a new Yara rule and click “Create”. The rule name will be extracted from the definition:
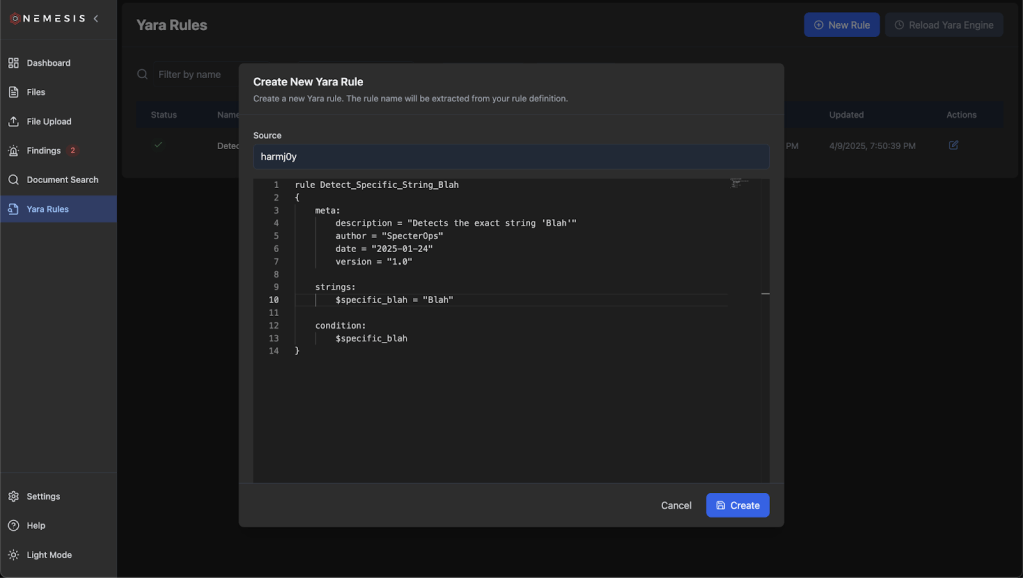
After rule creation, click the (now) green Reload Yara Engine button to ensure the Yara backend is reloaded with the new rule states. The rules will be saved in the database and reloaded if the entire system is brought down and up again. If you want to change the default set of rules without having to add rules on each deployment, add a new Yara file to ./libs/file_enrichment_modules/yara_rules/dev/ for development or ./libs/file_enrichment_modules/yara_rules/prod/ for production. This is reflected in our documentation.
Nemesis uses Nosey Parker wrapped through a customized Dapr pub/sub scanner implementation. There are a number of custom rules that are specified at ./projects/noseyparker_scanner/custom_rules/rules.yaml. If you want to add additional rules, just modify rules.yaml with the new rule (or add a new rules.yaml) and restart Nemesis or just the noseyparker-scanner container. This is also reflected in our documentation.
Building New C2 Connectors
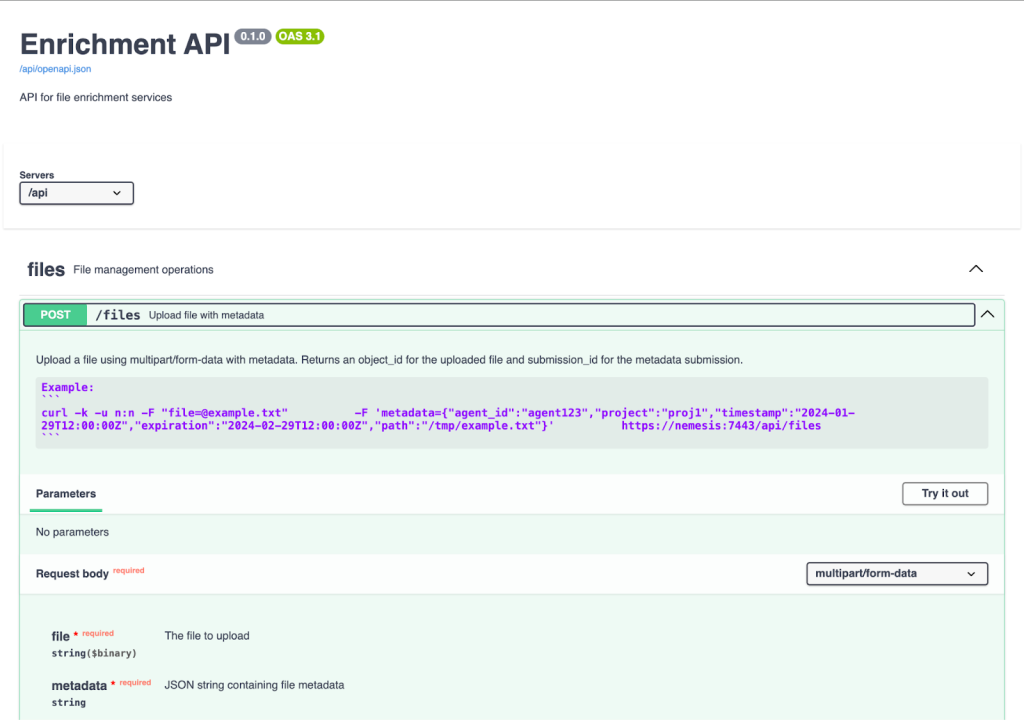
A “connector” for Nemesis is simply code that takes the downloads from a C2 platform and posts them to the https://nemesis:7443/api/files API route. How we implement this is going to vary depending on the exact architecture and features of the C2 we’re building a connector for.
For C2s that have a proper, supported API endpoint (obviously greatly preferred) we can implement a new connection type in the CLI project. This allows the CLI container to maintain a connection to the remote C2 to alert on new file downloads that it can synchronize back to Nemesis. This code could also function completely standalone; it just needs to trigger on file download events from the C2 and POST the file bytes and any metadata to the Nemesis API endpoint.
For C2s that don’t have a proper, supported API endpoint, we might have to get a bit more creative. For previous versions of Cobalt Strike for example, we would need to adapt the Nemesis 1.0.0 CS connector that consists of Aggressor scripting and customized Java in order to post file downloads straight to Nemesis (though this appears to be changing with the upcoming 4.12 release).
The Nemesis /files API
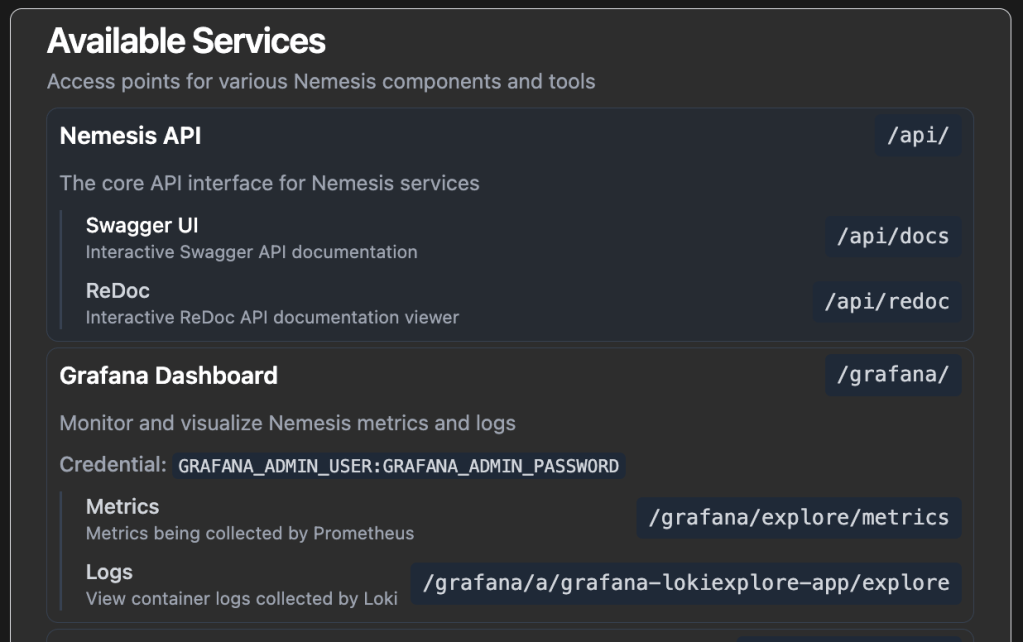
Before we write anything, we need to know how the API works. In a Nemesis instance, clicking on the “Help” link in the bottom left shows the current existing Nemesis services, including Swagger and ReDoc documentation for the complete Nemesis API:

Note: We also have a GitHub action that will automatically build and push API documentation to our Nemesis documentation site whenever the API changes, for offline access.
The structure of the file message posted to the API is documented here. The post_file() function nemesis_client.py file in the CLI project has Python code that shows how to upload file bytes along with file metadata.
Implementation of a new connector is left as an exercise for the reader 🙂
Wrapup
The new Nemesis 2.X structure is significantly simpler than 1.0 and should be considerably easier to modify. We hope that this enables operators and developers to create a swath of new enrichment modules to contribute back to Nemesis!